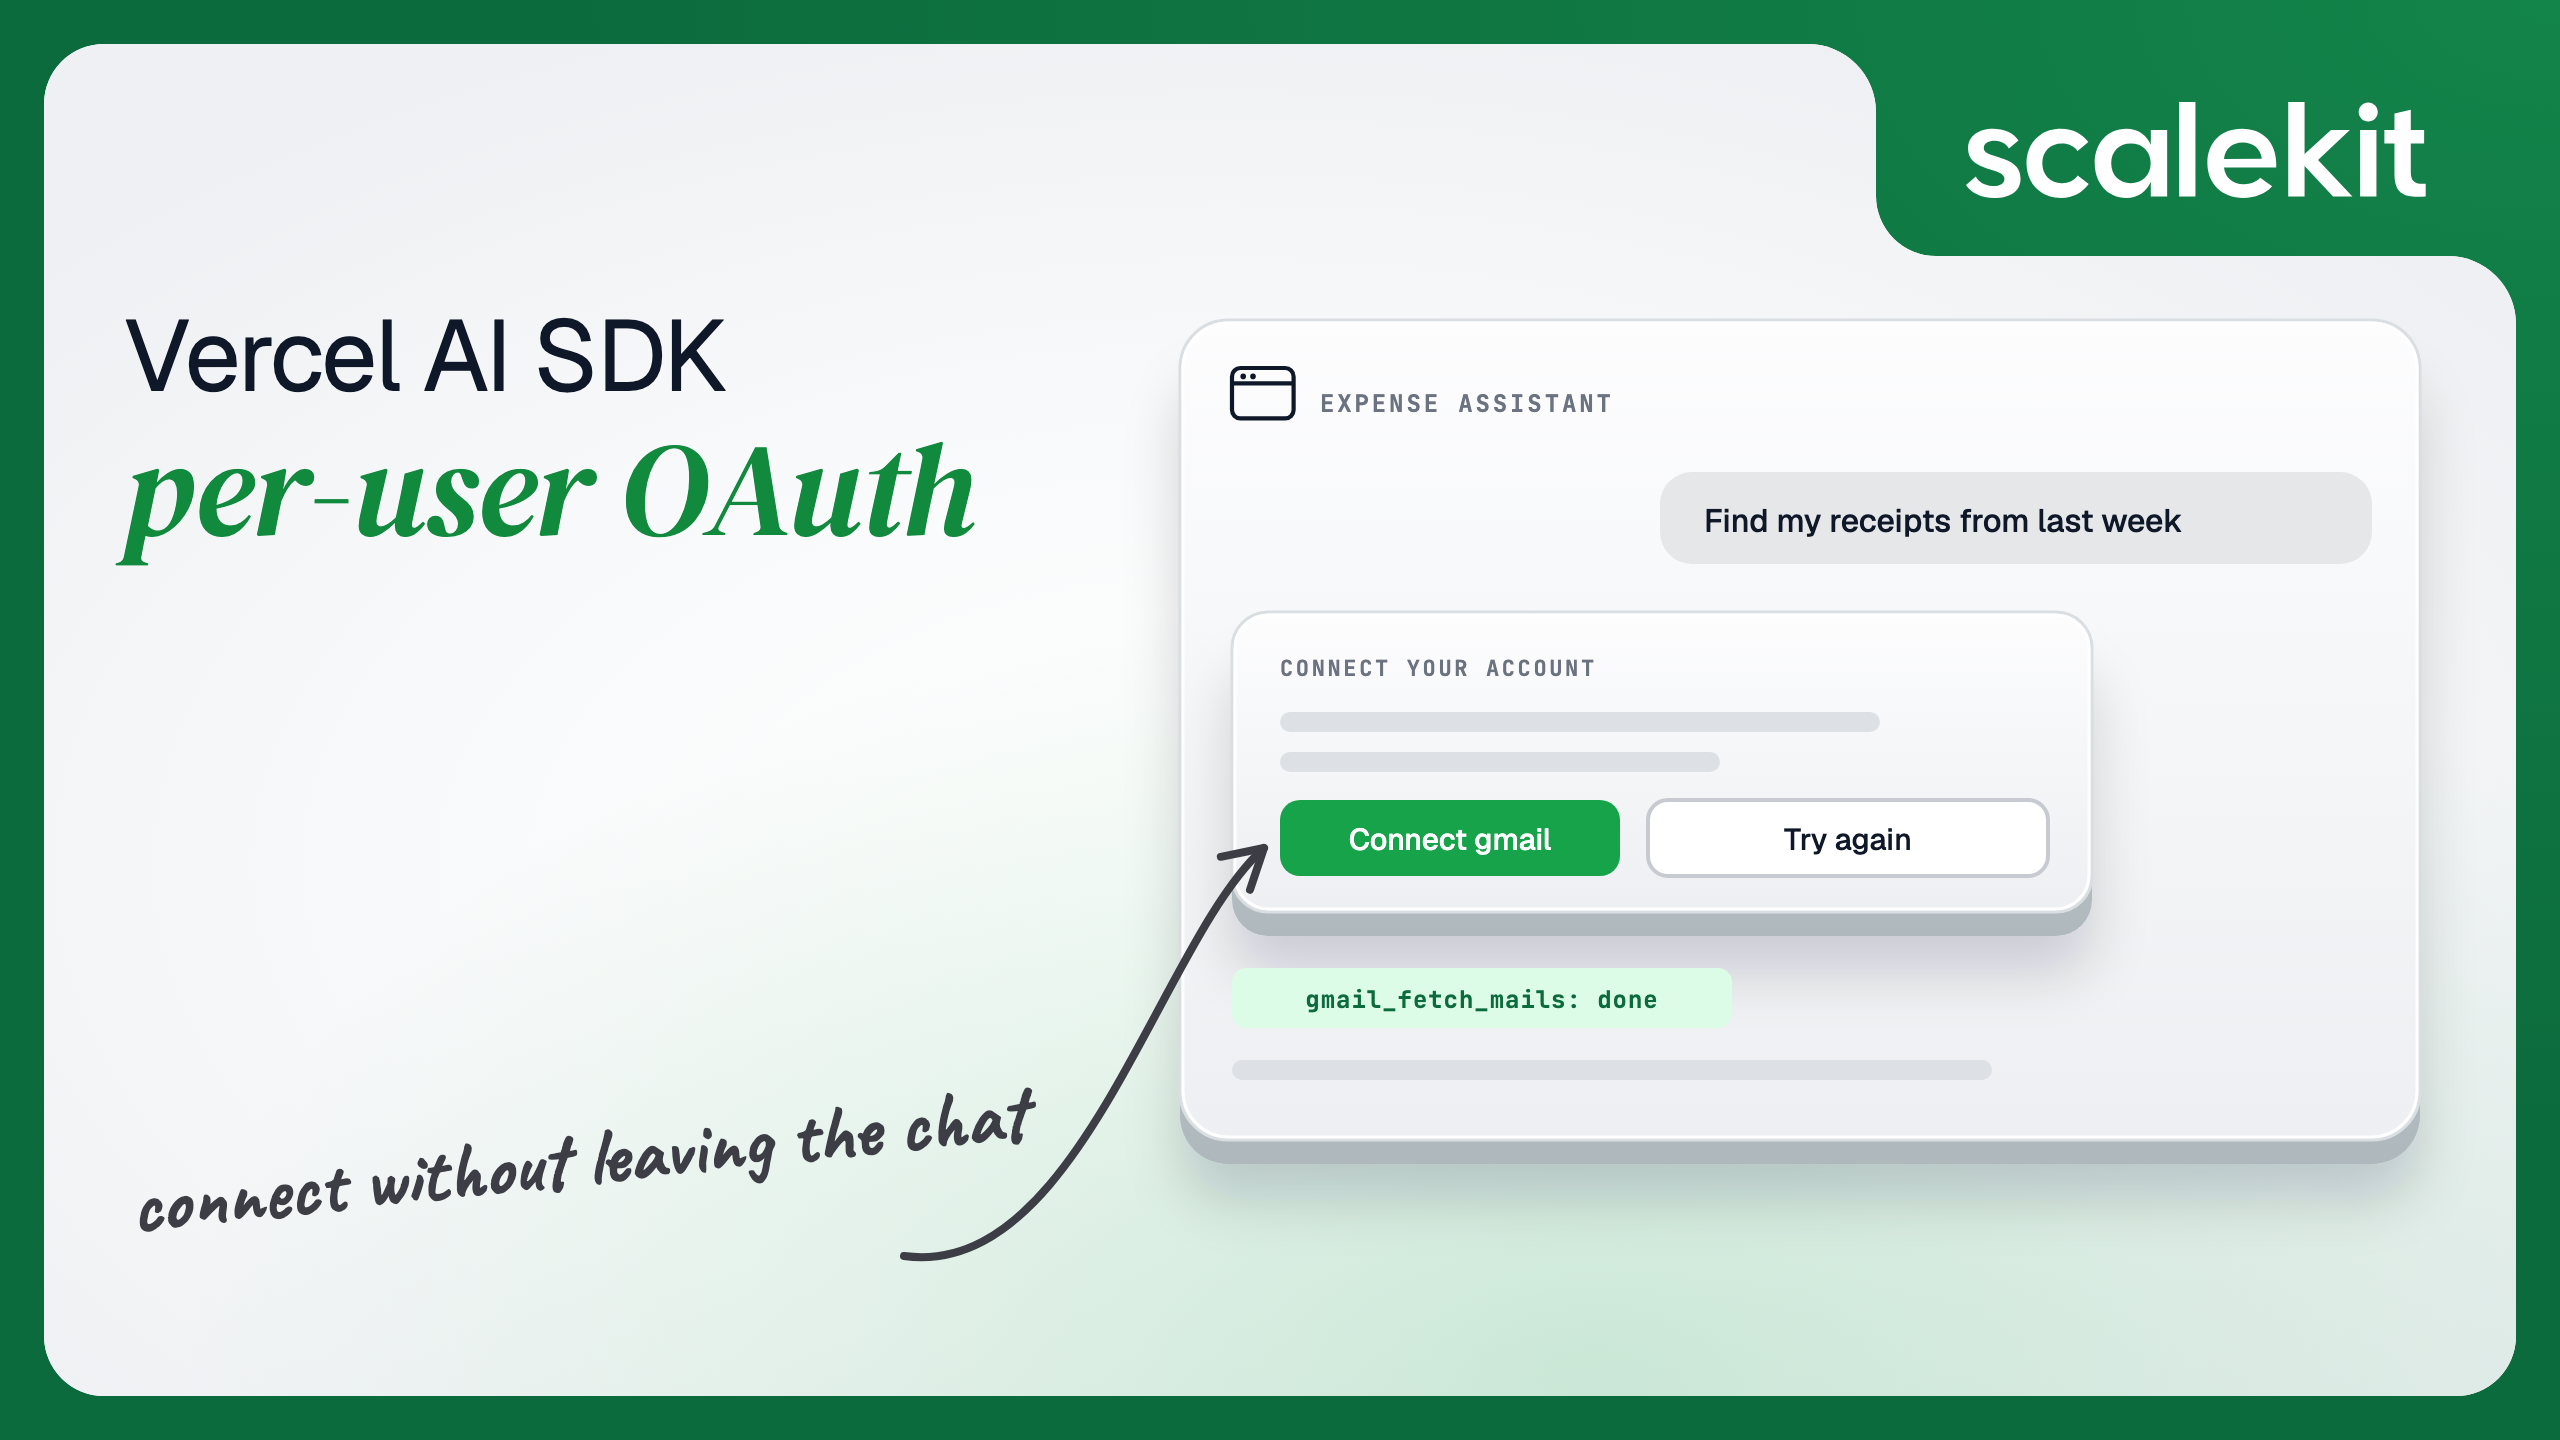
Suppose we have a company that sells expense management software. Its Next.js app gets a chat assistant that finds receipts in each employee's Gmail and turns them into a draft expense list.
Every employee connects their own inbox, and the assistant must only ever read the inbox of the person typing. That one rule shapes the whole build: where the OAuth token lives, how the employee connects, and what happens when the grant expires halfway through a conversation.
This tutorial builds that assistant with the Vercel AI SDK and AgentKit. Every code excerpt below comes from one working Next.js app, which passes a type check and a production next build.
TL;DR
To give a Vercel AI SDK agent each user's own Gmail tools, map the app session to a Scalekit identifier and check that user's connected account before the model runs. If it isn't ACTIVE, send a connect card into the chat.
Once the account is active, wrap the user's scoped tools with tool() and jsonSchema(), and let streamText run the tool loop. Tokens stay in AgentKit and never reach the browser.
The MCP path does the same job with @ai-sdk/mcp, a Virtual MCP server, and a short-lived session token per user.
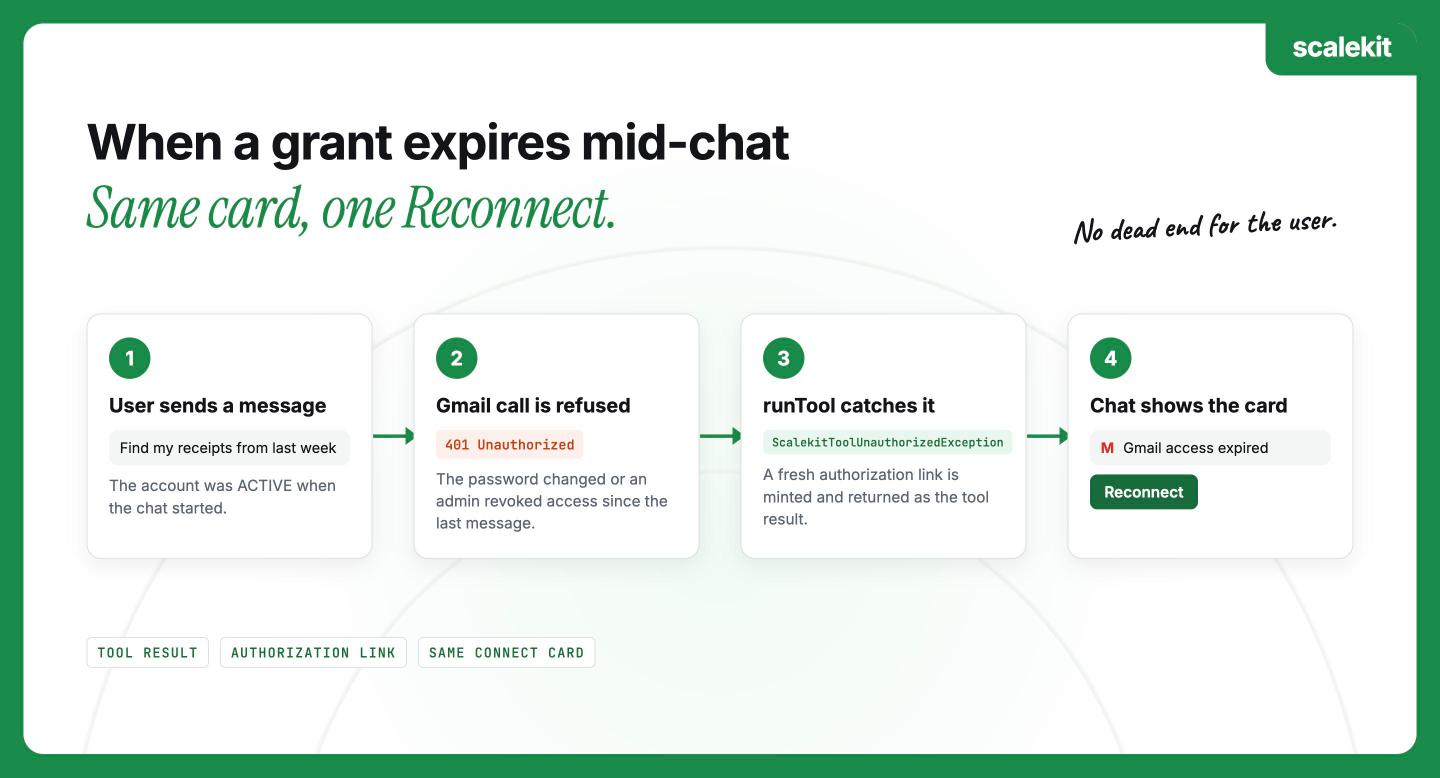
A grant can expire in the middle of a chat. Catch the unauthorized error inside the tool, return a fresh authorization link, and show the same card with Reconnect.
Both routes and the chat UI run in one Next.js app that you can deploy on Vercel.
How Does the Vercel AI SDK Handle Tools That Touch User Data?
The Vercel AI SDK is a TypeScript toolkit for building AI apps and agents. On the server, you call streamText, and in React the useChat hook renders the streamed reply as it arrives.
A tool is a function the model can ask your server to run.
You define one with tool(), giving it a description, an input schema, and an execute function, as the AI SDK tool calling guide shows.
When the model calls a tool, the SDK runs execute and feeds the result back, and stopWhen: isStepCount(5) lets that loop run up to five steps.
A weather tool needs no login. A tool that reads Gmail needs one specific person's OAuth token, which raises three questions the AI SDK leaves to you:
Whose token is this? The assistant has to read the inbox of the employee who is typing, and nobody else's.
Where does the token live? It can't sit in the browser, and you don't want it in your own database either.
AgentKit answers all three. It runs each user's OAuth flow, stores their tokens in a vault, and executes tool calls as that user. Three AgentKit terms show up in the code below:
Connection: an app you set up once in the Scalekit dashboard, such as gmail.
Connected account: one user's grant for one connection, with a status such as ACTIVE, PENDING_AUTH, or EXPIRED.
Identifier: your app's own ID for the user. AgentKit uses it to pick the right connected account on every call.
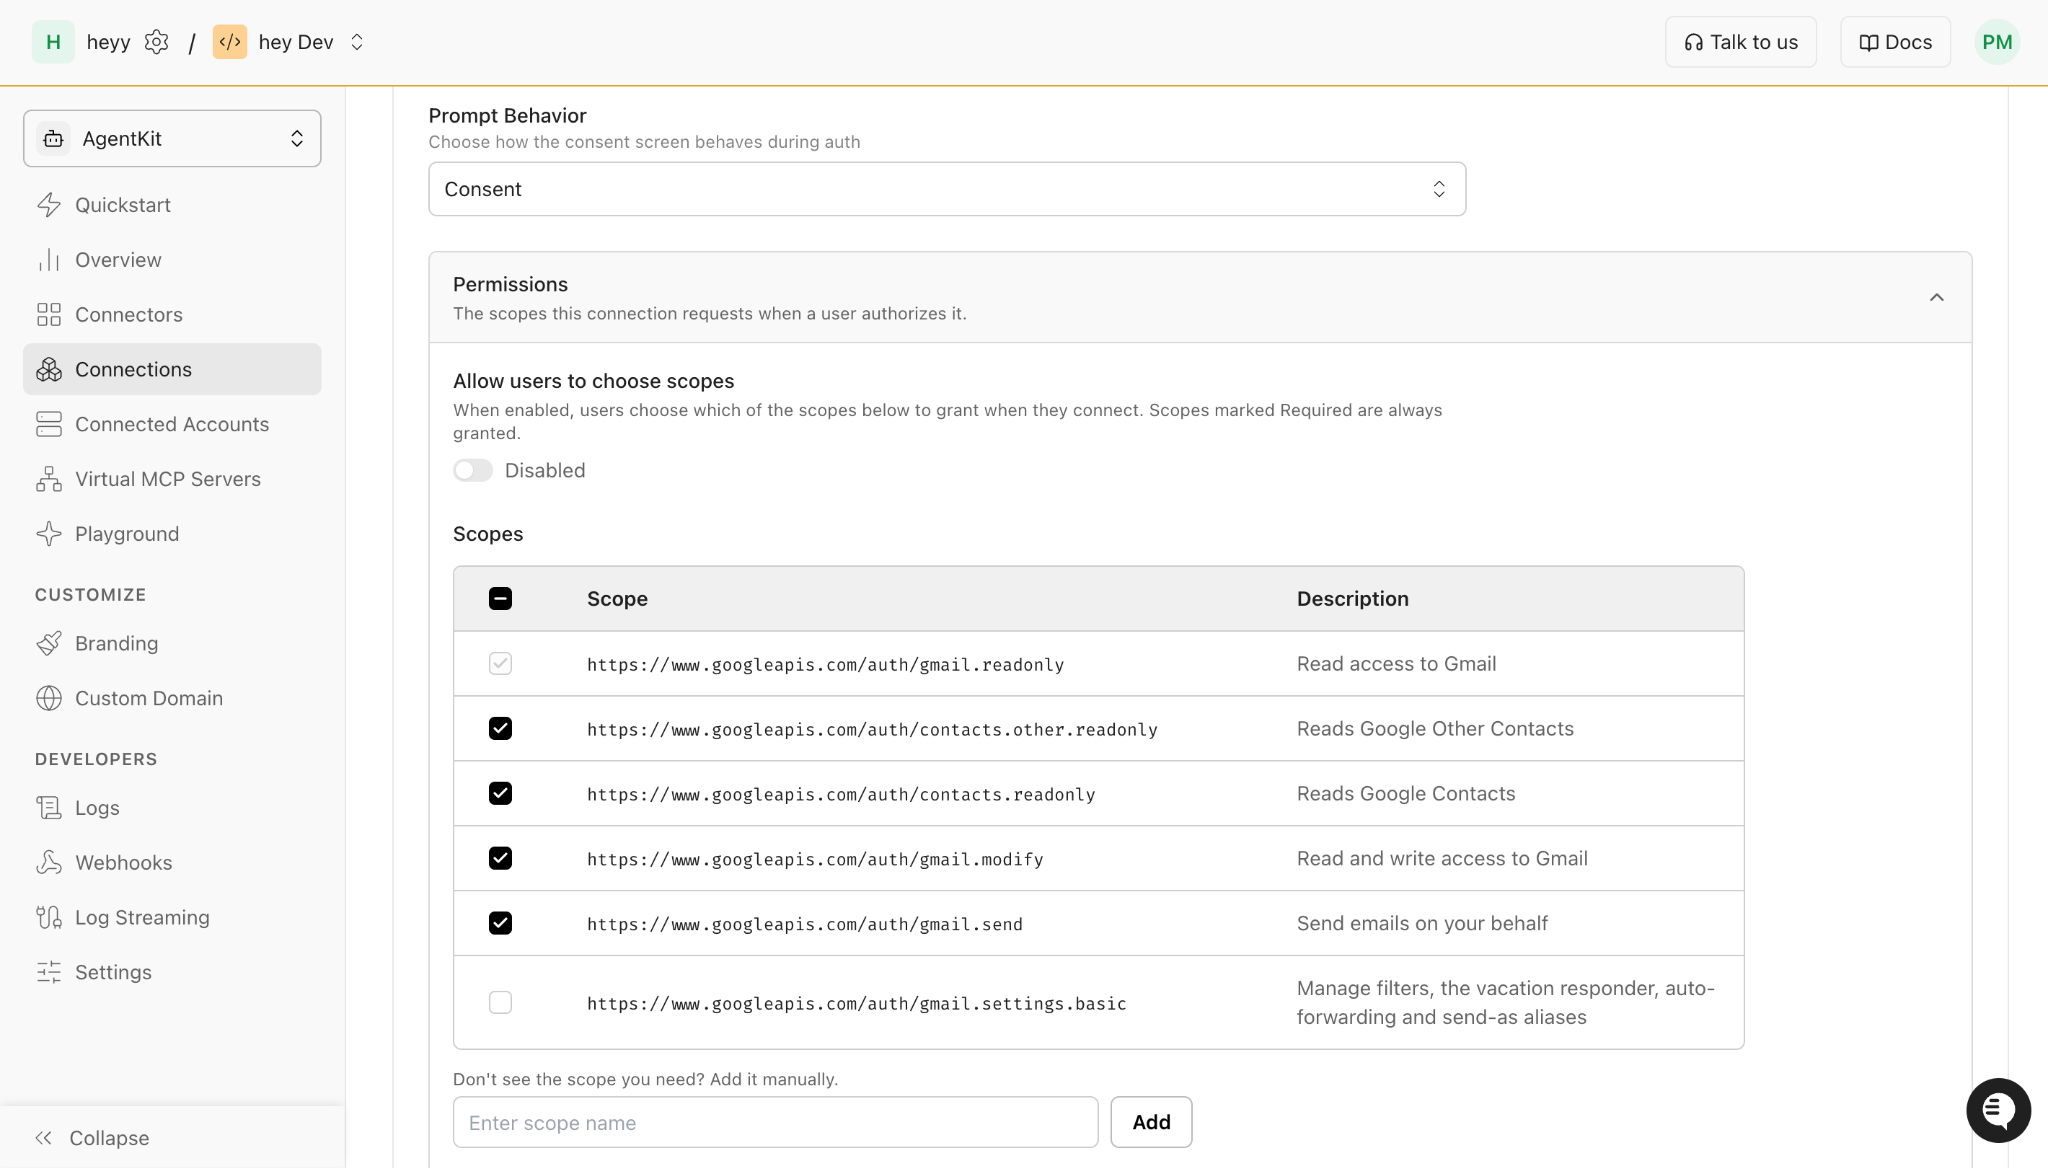
The Gmail connection you create in the dashboard lists the scopes a user is asked to grant. The scopes you tick set the most a user can grant, while the read-only filter in this app limits what the assistant can call.
The Permissions section of the Gmail connection in the Scalekit dashboard.
How Does a Chat Request Reach Each User's Gmail?
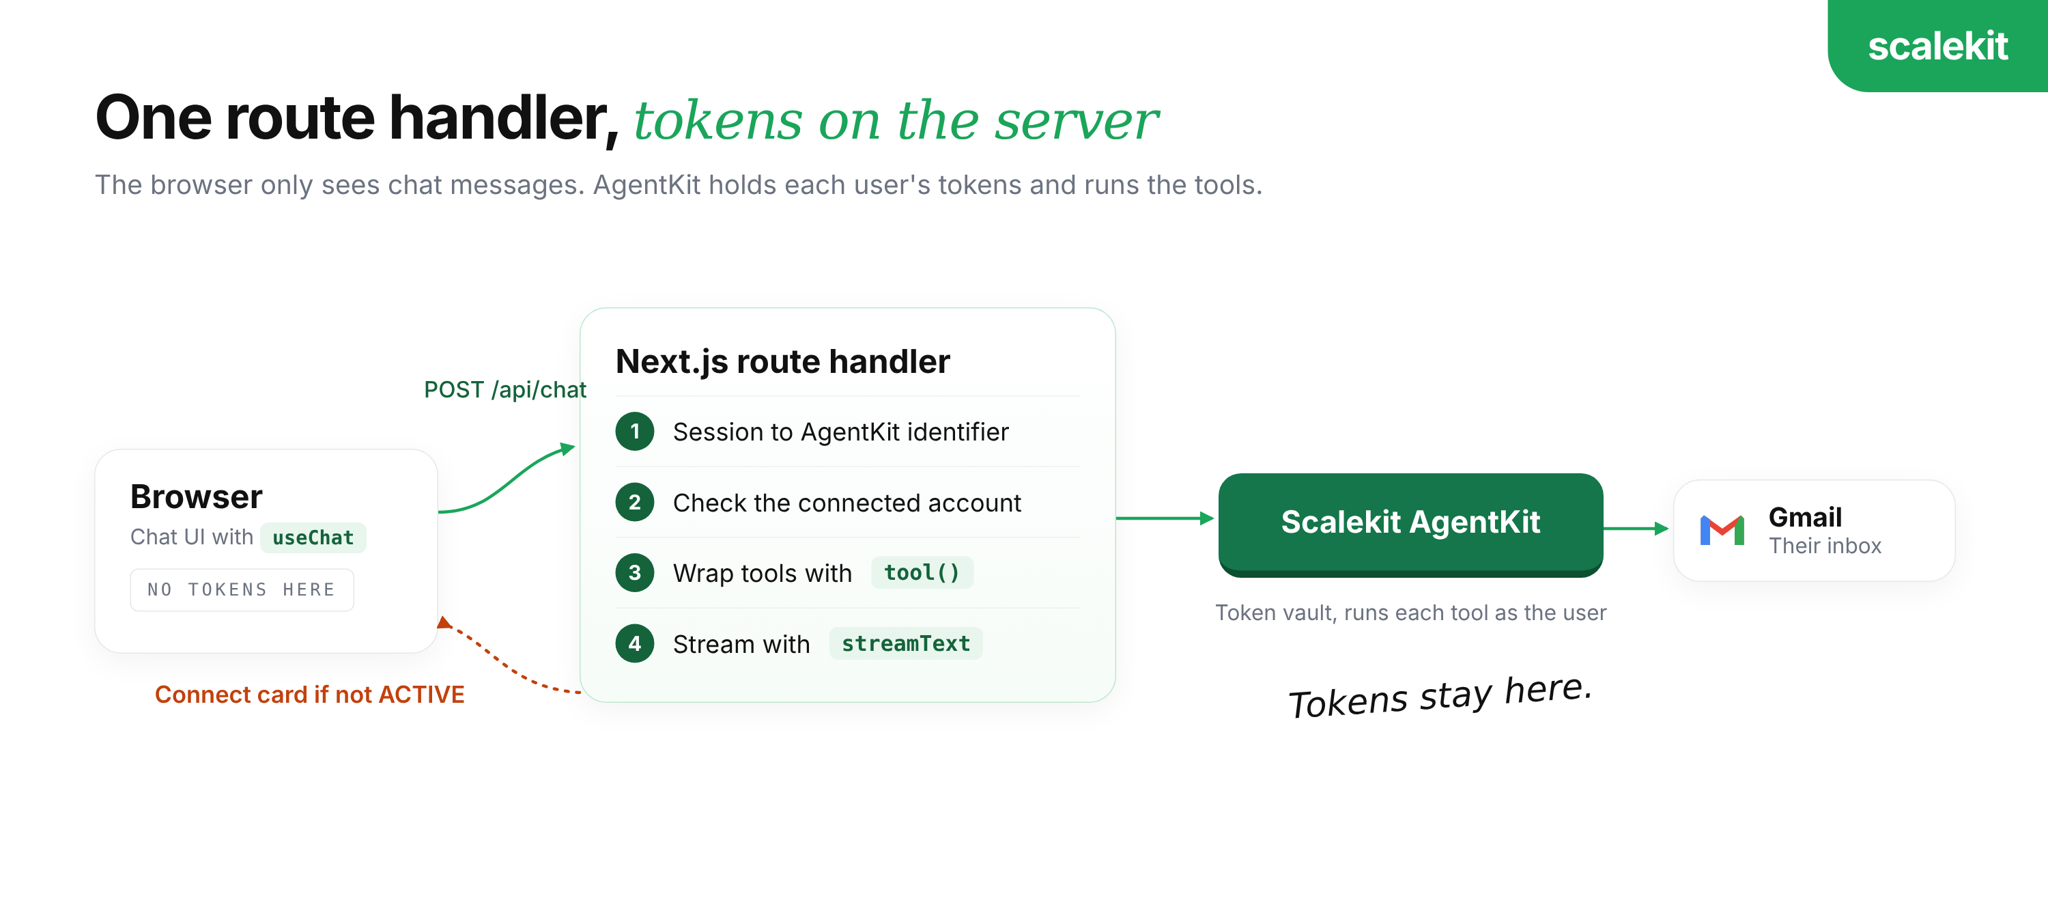
The function-tool path runs through one Next.js route handler. The browser sends chat messages to /api/chat, and everything that touches a token happens on the server from there.
On each chat request, the route handler does four things in order:
Maps the session to an identifier. The signed-in employee becomes the AgentKit identifier for every call in this request.
Checks the connected account. If Gmail isn't ACTIVE for this employee, the route sends back a connect card and skips the model.
Wraps the employee's tools. Each scoped tool becomes an AI SDK tool whose execute calls AgentKit as this employee.
Streams the reply.streamText runs the tool loop, and useChat renders the result.
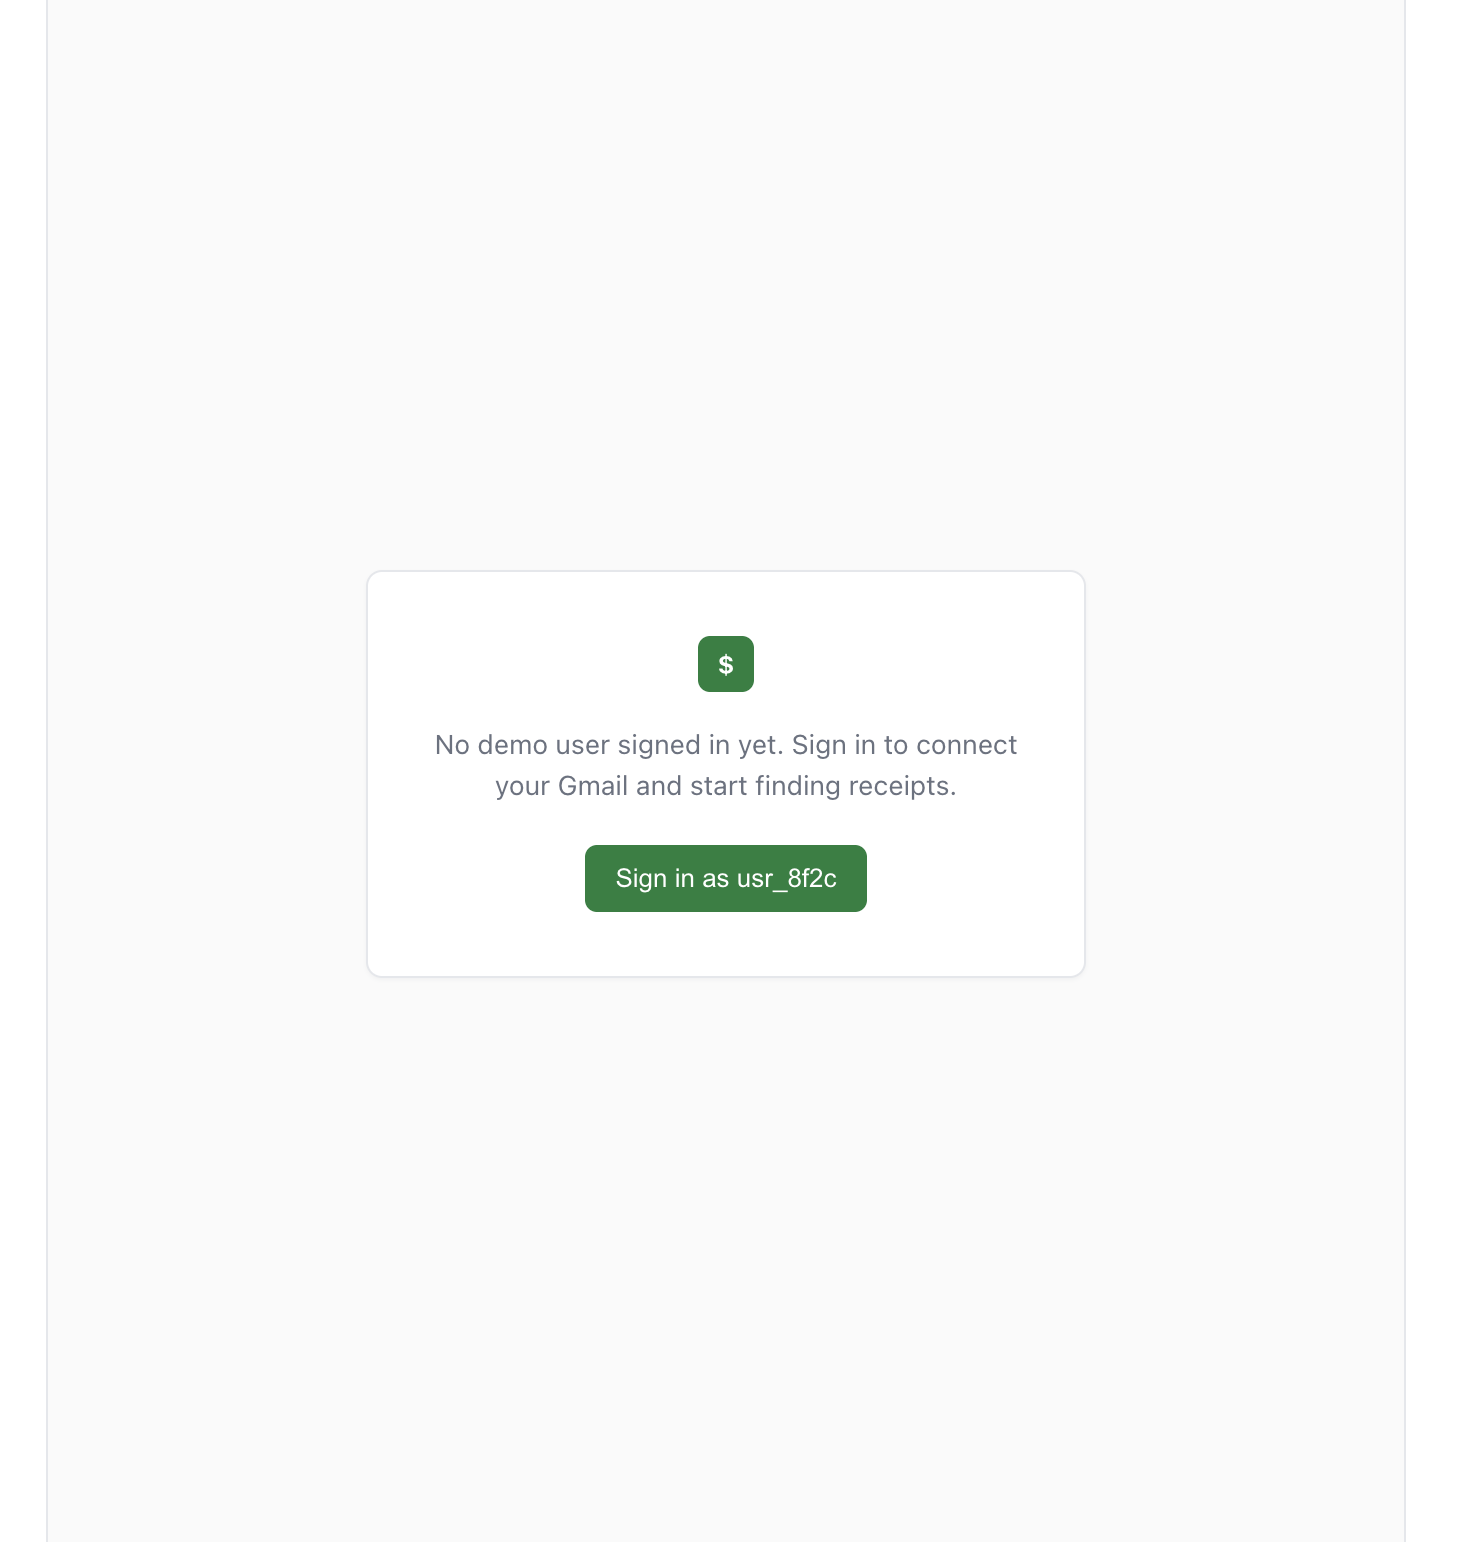
Step 1 is the only place your auth library meets AgentKit. The example uses a demo cookie so it runs without an auth provider, and you swap in your real session:
The demo app signs in as usr_8f2c, and that value is the AgentKit identifier.
// lib/identity.ts
import 'server-only';
import { cookies } from 'next/headers';
export const DEMO_USER_COOKIE = 'demo_user_id';
// Map the signed-in user to an AgentKit identifier.
// Replace this with your auth library and return your app's stable internal user ID.
// Don't use an email address: it can change, and it ends up in tool call logs.
export async function getAgentKitIdentifier(): Promise<string | null> {
const store = await cookies();
return store.get(DEMO_USER_COOKIE)?.value ?? null;
}
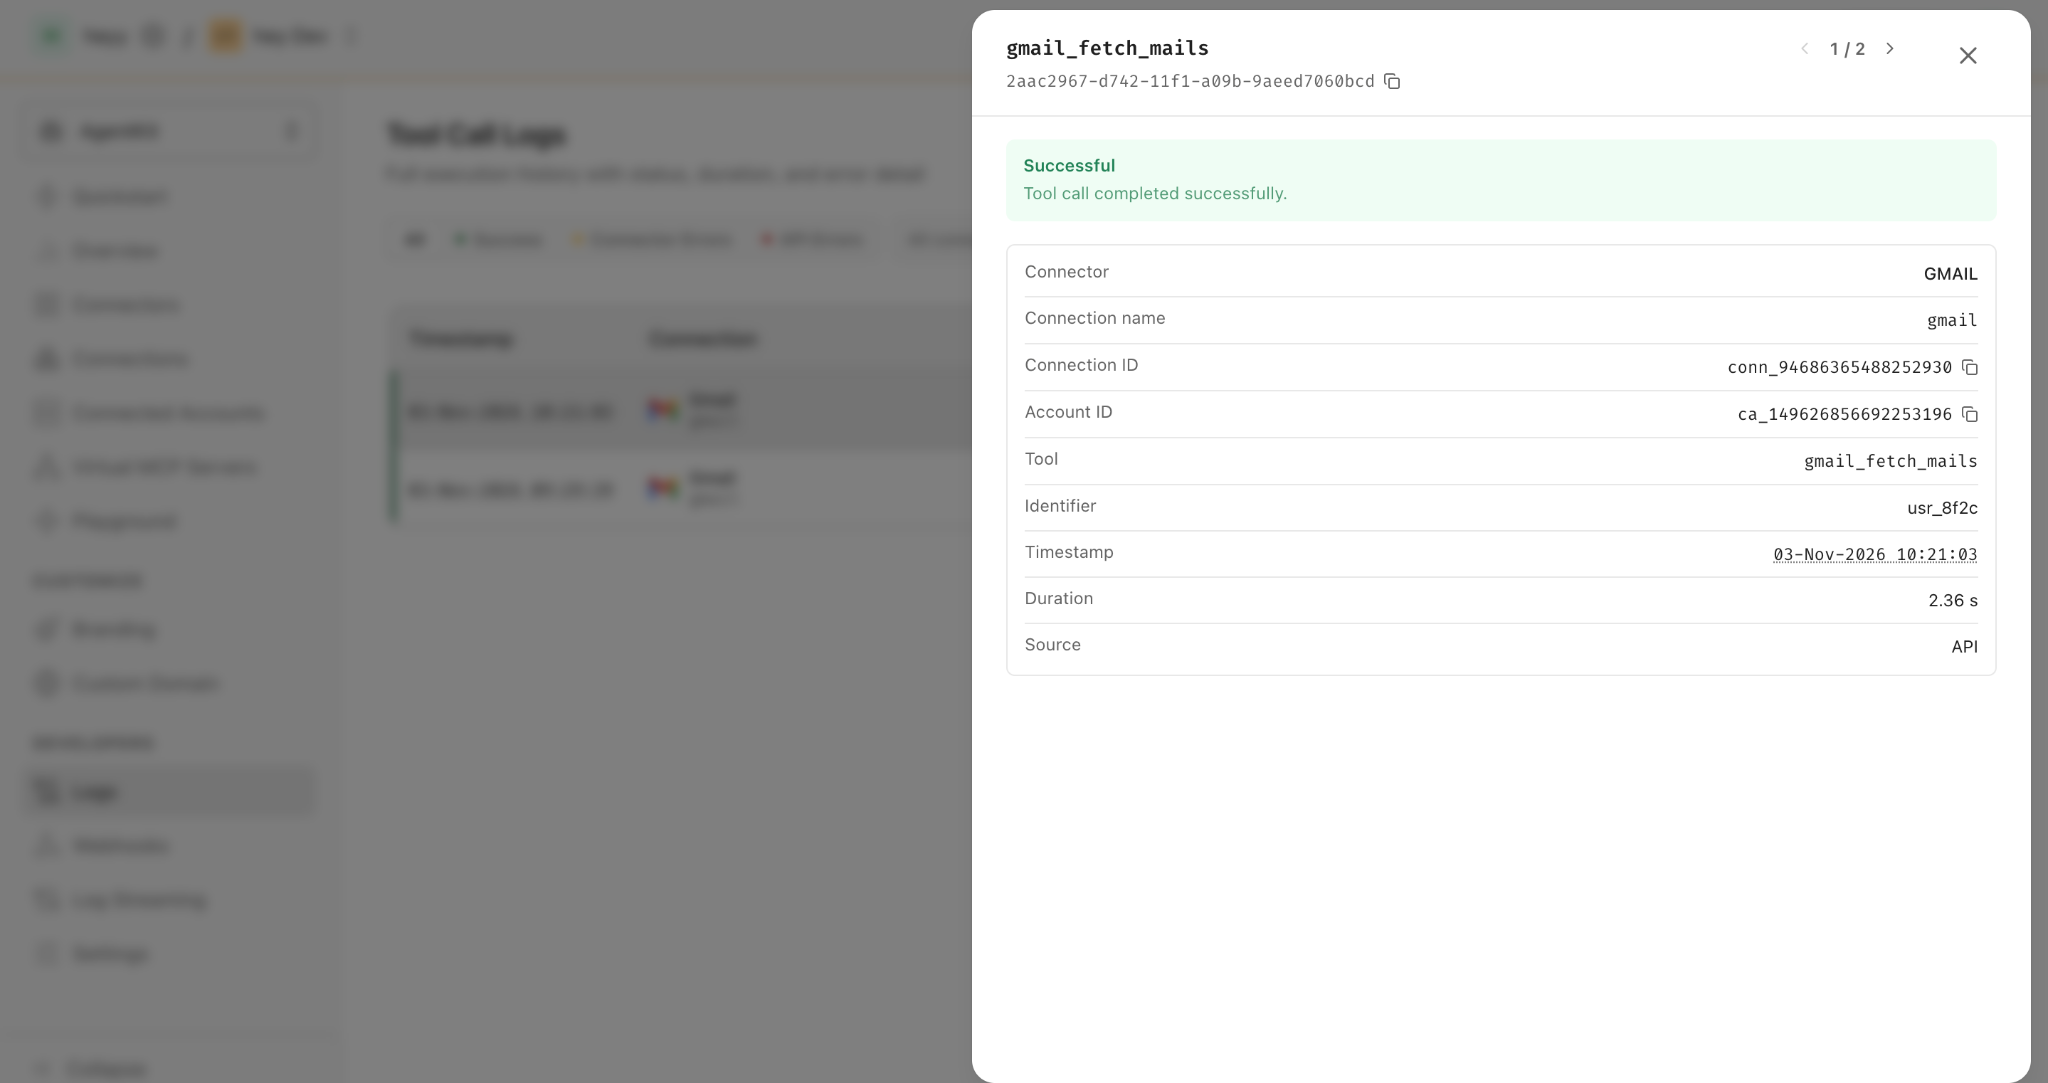
Use an ID that stays stable for the life of the account. AgentKit stores the identifier in its tool call logs, so an internal user ID keeps email addresses out of them.
A tool call log entry in the Scalekit dashboard, showing the tool name and the usr_8f2c identifier.
How Do First-Time Users Connect Gmail Inside the Chat?
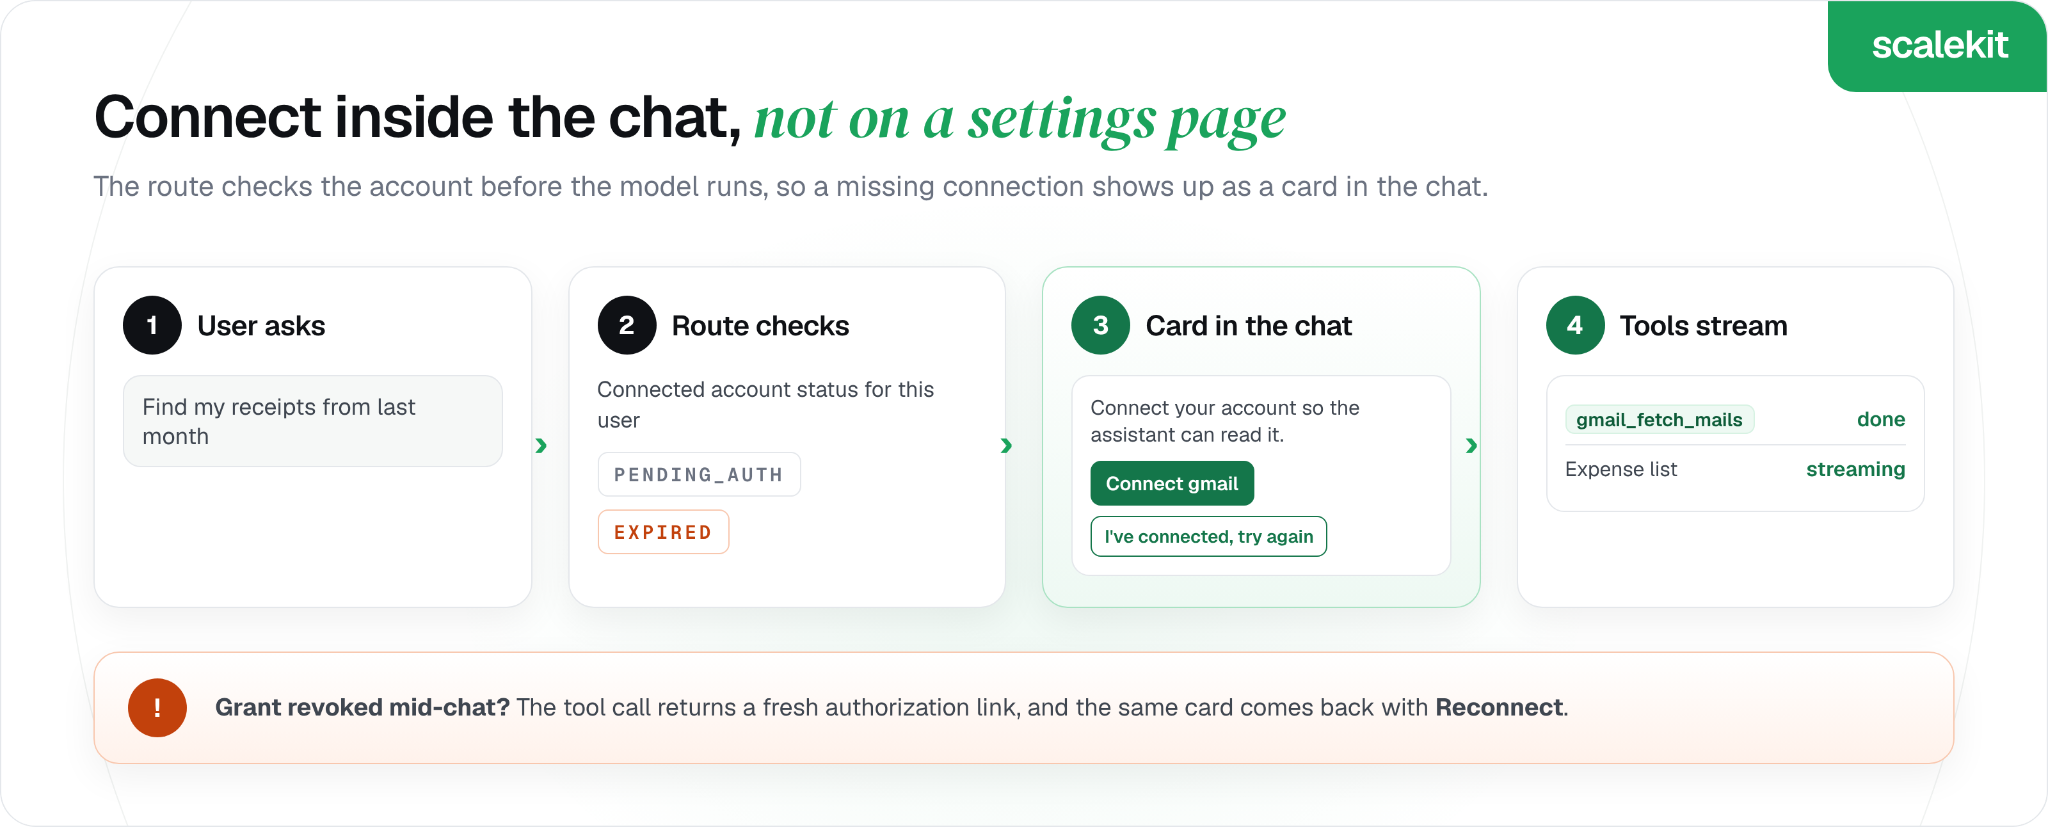
The first time an employee asks for receipts, they haven't connected Gmail yet. A settings page would send them away from the conversation, so the assistant asks them to connect right inside the chat.
The route checks every connection before the model runs. For any account that isn't ACTIVE, it mints an authorization link, which opens the Hosted Connect Widget, our hosted page that shows the provider's consent screen:
// lib/agentkit.ts
// Before the model runs: is every connection ACTIVE for this user?
// Returns a connect card with a fresh authorization link for each app that isn't.
export async function checkConnections(identifier: string): Promise<ConnectCard | null> {
const apps: ConnectCard['apps'] = [];
let expired = false;
for (const connectionName of connectionNames()) {
const { connectedAccount } = await scalekit().actions.getOrCreateConnectedAccount({
connectionName,
identifier,
});
const status = connectedAccount?.status ?? ConnectorStatus.CONNECTION_STATUS_UNSPECIFIED;
if (status === ConnectorStatus.ACTIVE) continue;
if (status === ConnectorStatus.EXPIRED) expired = true;
// Links expire after five minutes, so mint one per request instead of caching it
const { link } = await scalekit().actions.getAuthorizationLink(linkOptions(connectionName, identifier));
apps.push({ connection: connectionName, status: ConnectorStatus[status], link });
}
return apps.length > 0 ? { reason: expired ? 'expired' : 'not_connected', apps } : null;
}
The route then answers with a custom data part in place of a model reply. createUIMessageStream lets you write any typed part into the same stream useChat already reads:
// lib/respond.ts
// Answer the chat request with a connect card instead of a model reply
export function connectCardResponse(card: ConnectCard): Response {
return createUIMessageStreamResponse({
stream: createUIMessageStream<ChatMessage>({
execute: ({ writer }) => {
writer.write({ type: 'data-connect', data: card });
},
}),
});
}
On the client, a data-connect part renders as a card with one button per app. The link opens in a new tab, so the chat stays where it was, and I've connected, try again calls regenerate() from useChat, which replaces the card with a fresh reply to the same question:
// app/chat.tsx
function ConnectCardView({ card, onRetry }: { card: ConnectCard; onRetry: () => void }) {
return (
<div className="card">
<p>
{card.reason === 'expired'
? 'Your connection expired. Reconnect to continue.'
: 'Connect your account so the assistant can read it for you.'}
</p>
{card.apps.map((app) => (
<a key={app.connection} className="button" href={app.link} target="_blank" rel="noreferrer">
{card.reason === 'expired' ? 'Reconnect' : 'Connect'} {app.connection}
</a>
))}
<button type="button" onClick={onRetry}>
I've connected, try again
</button>
</div>
);
}
A few details keep this flow reliable:
Mint the link per request. By default, an authorization link expires five minutes after you create it, so a cached link fails for anyone who waits.
Skip the model when nothing is connected. The model never plans around a Gmail tool this employee can't use yet.
Turn on user verification before launch. New environments activate an account for whoever completes the OAuth flow. Before launch, switch to Custom user verifier mode, add a verify endpoint, and set AGENTKIT_USER_VERIFY_URL, which the app passes on every link request; without it, link requests in that mode fail with a 400.
How Do You Wrap Each User's Tools With tool()?
Once Gmail is ACTIVE, the route loads the tools scoped to this employee. listScopedTools returns the tool definitions their connected accounts can run, 100 per page, each with a JSON Schema for its input.
The AI SDK can't infer types from a schema it only sees at runtime, so jsonSchema() passes the definition through as it is. Each execute calls AgentKit with the employee's identifier, and AgentKit adds their token on its side:
// lib/agentkit.ts
// Load this user's scoped tools and wrap each one for the AI SDK with tool() and jsonSchema().
// readOnly keeps only tools marked read_only_hint, so this assistant can't send or delete.
export async function loadUserTools(identifier: string, readOnly = true): Promise<ToolSet> {
const tools: ToolSet = {};
for (const connection of connectionNames()) {
let pageToken: string | undefined;
do {
const page = await scalekit().tools.listScopedTools(identifier, {
filter: { connectionNames: [connection] },
pageSize: 100,
pageToken,
});
for (const scoped of page.tools) {
const definition = scoped.tool?.definition as
| { name?: string; description?: string; input_schema?: object; annotations?: { read_only_hint?: boolean } }
| undefined;
if (!definition?.name) continue;
if (readOnly && definition.annotations?.read_only_hint !== true) continue;
const name = definition.name;
tools[name] = tool({
description: definition.description ?? '',
inputSchema: jsonSchema<Record<string, unknown>>(
(definition.input_schema ?? { type: 'object', properties: {} }) as Parameters<typeof jsonSchema>[0],
),
execute: (input) => runTool(identifier, connection, name, input),
});
}
pageToken = page.nextPageToken || undefined;
} while (pageToken);
}
return tools;
}
The expense assistant only needs to read. AgentKit's built-in tool definitions carry a read_only_hint, so the app keeps only read-only tools by default, and a prompt-injected email has no send or delete tool to call. Our guide to what an agent tool calling platform is covers why that per-tool scope belongs in the platform layer.
The route handler ties the steps together:
// app/api/chat/route.ts
// 2. Not connected, or connection expired: send a connect card, skip the model
const card = await checkConnections(identifier);
if (card) return connectCardResponse(card);
// 3. Wrap this user's scoped tools and let streamText run the tool loop
const tools = await loadUserTools(identifier);
const result = streamText({
model: process.env.AI_MODEL ?? DEFAULT_MODEL,
system: SYSTEM_PROMPT,
messages: await convertToModelMessages(messages),
tools,
stopWhen: isStepCount(5),
});
return createUIMessageStreamResponse({
stream: toUIMessageStream({
stream: result.stream,
onError: () => 'The assistant hit an error. Try again in a moment.',
}),
});
The model string goes through the Vercel AI Gateway, which authenticates with OIDC once the app runs on Vercel. Locally, set AI_GATEWAY_API_KEY, or swap in any AI SDK provider.
Can You Use MCP Instead, With @ai-sdk/mcp?
The AI SDK also speaks the Model Context Protocol (MCP), the open standard for exposing tools to AI models. Its createMCPClient from @ai-sdk/mcp connects to an MCP server and turns its tools into AI SDK tools for you.
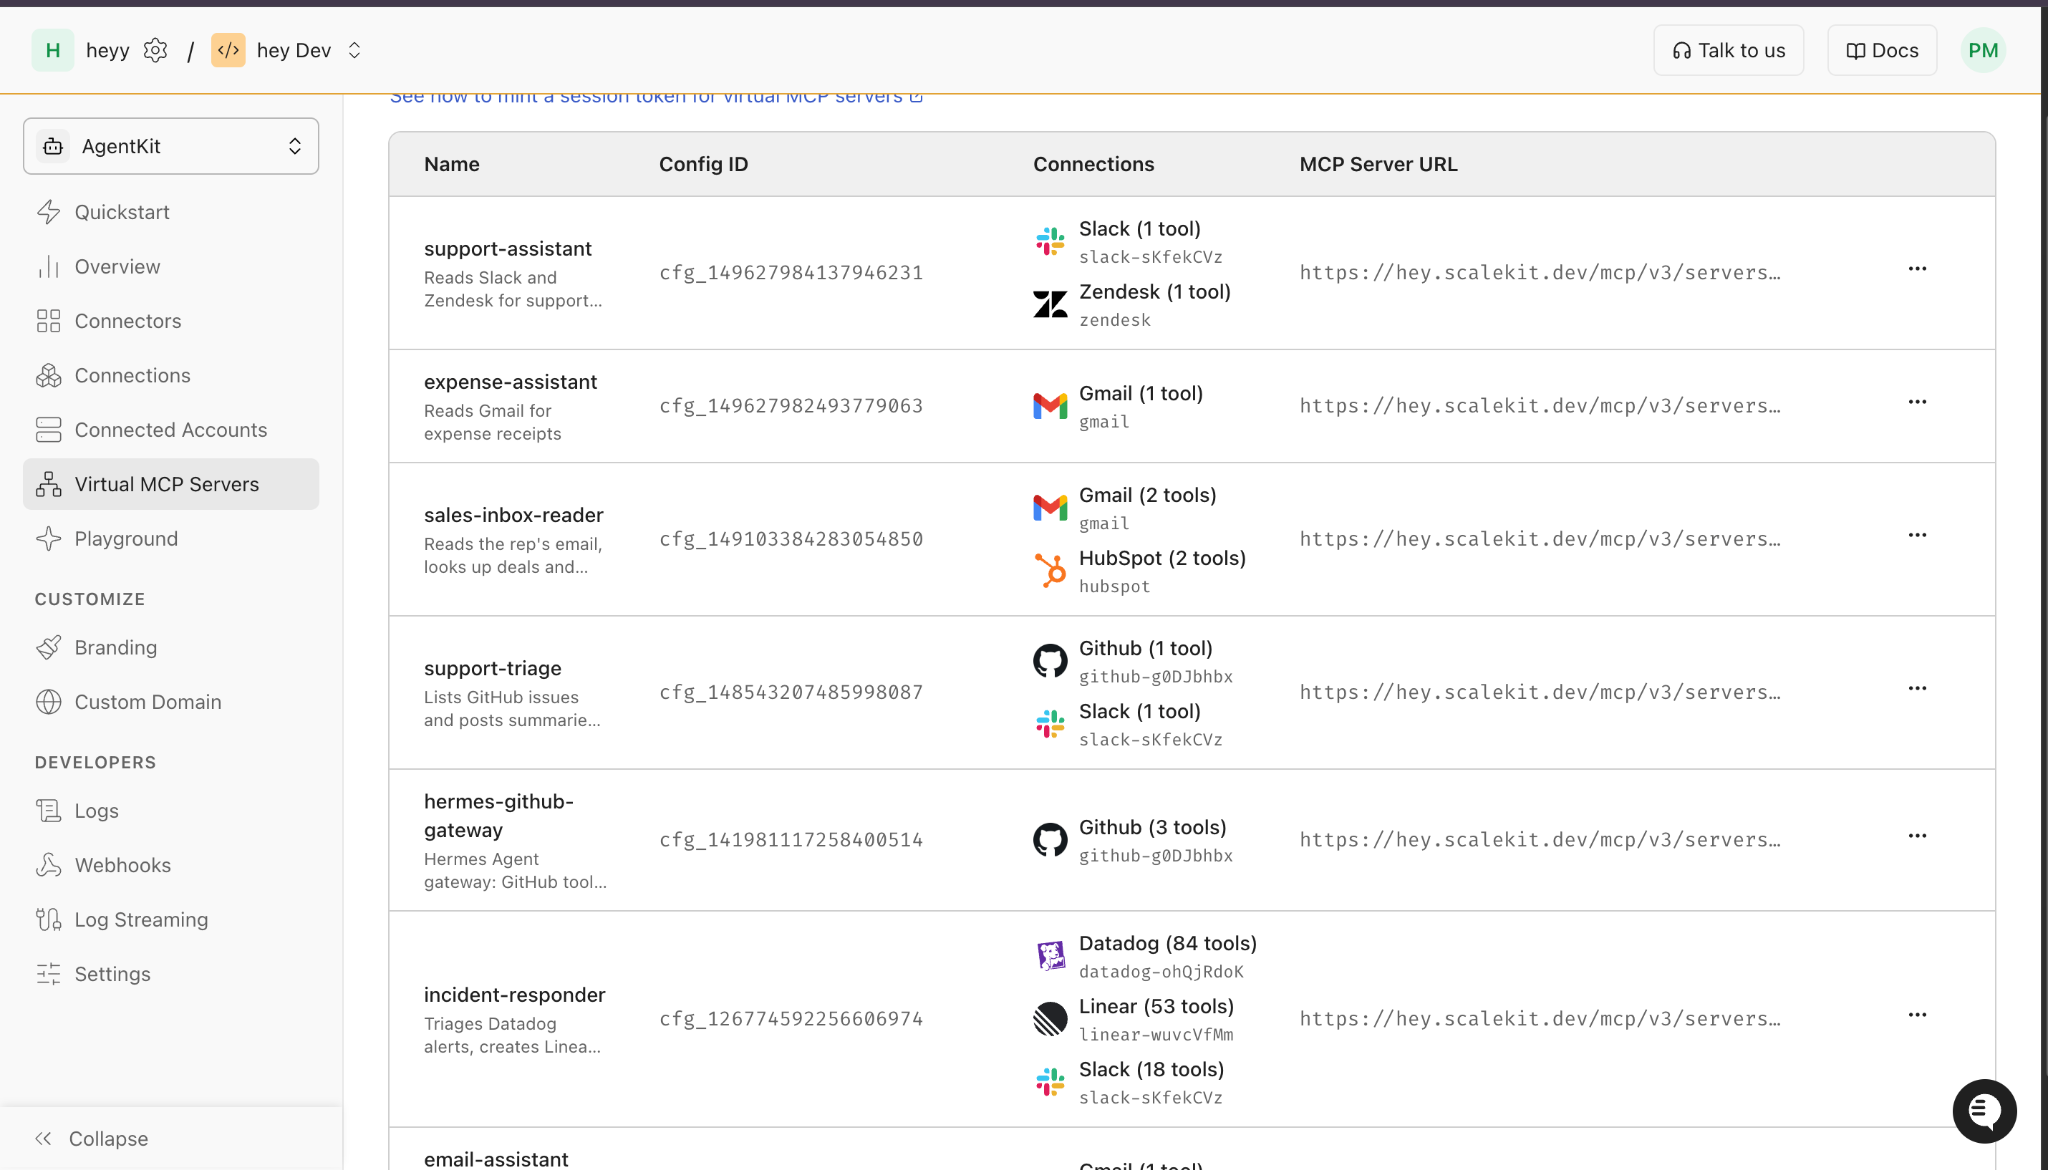
On the AgentKit side, the MCP endpoint is a Virtual MCP server: a hosted MCP endpoint that exposes only the tools you pick for one agent role. You create it once in the dashboard or the SDK, and every employee shares its URL.
What makes each request per-user is the session token. Your route mints one for the signed-in employee, and the token works on that one server for that one person:
// app/api/chat-mcp/route.ts
// 2. Mint a short-lived session token bound to this user and this server
const { config } = await mcp.getConfig(configId);
const session = await mcp.createSessionToken({
mcpConfigId: configId,
identifier,
expirySeconds: 10 * 60,
accessLevel: 'READ_ONLY',
});
// 3. Load the server's tools over MCP and stream
const mcpClient = await createMCPClient({
transport: {
type: 'http',
url: config!.mcpServerUrl,
headers: { Authorization: `Bearer ${session.token}` },
},
});
const result = streamText({
model: process.env.AI_MODEL ?? DEFAULT_MODEL,
system: SYSTEM_PROMPT,
messages: await convertToModelMessages(messages),
tools: await mcpClient.tools(),
stopWhen: isStepCount(5),
onEnd: async () => {
await mcpClient.close();
},
onError: async () => {
await mcpClient.close();
},
});
Before minting, the MCP route calls listConnectedAccounts for the server with includeAuthLink: true and sends the same connect card for any app that isn't ACTIVE. A few details apply to this path:
Token lifetime: a session token lasts one hour unless you set an expiry between 60 seconds and 24 hours. The example sets ten minutes, which covers one chat turn.
Read-only access: with accessLevel: 'READ_ONLY', the token sees only the server's read-only tools, plus connect_account so the agent can still ask the user to connect an app.
Client cleanup: close the MCP client in onEnd so the connection doesn't stay open after a streamed response.
The two paths reach the same result, so pick by where you want tool selection to live:
Function tools with tool()
Virtual MCP server
Tool list
Built in your route on each request
Defined once on the server, per agent role
Per-user auth
Identifier on every executeTool call
Session token minted per request
Best fit
One app, full control over each wrapper
Several apps or agents sharing one tool set
How Do You Show Streamed Tool Calls in the Chat UI?
useChat gives you each message as a list of parts, in the order the model produced them. Text arrives as text parts, and every tool call arrives as a tool part that moves from input to output as the step runs.
Function tools built with tool() stream as tool-{name} parts, while tools loaded over MCP stream as dynamic-tool parts. isToolUIPart matches both, and getToolOrDynamicToolName reads the name from either, so one branch renders both routes:
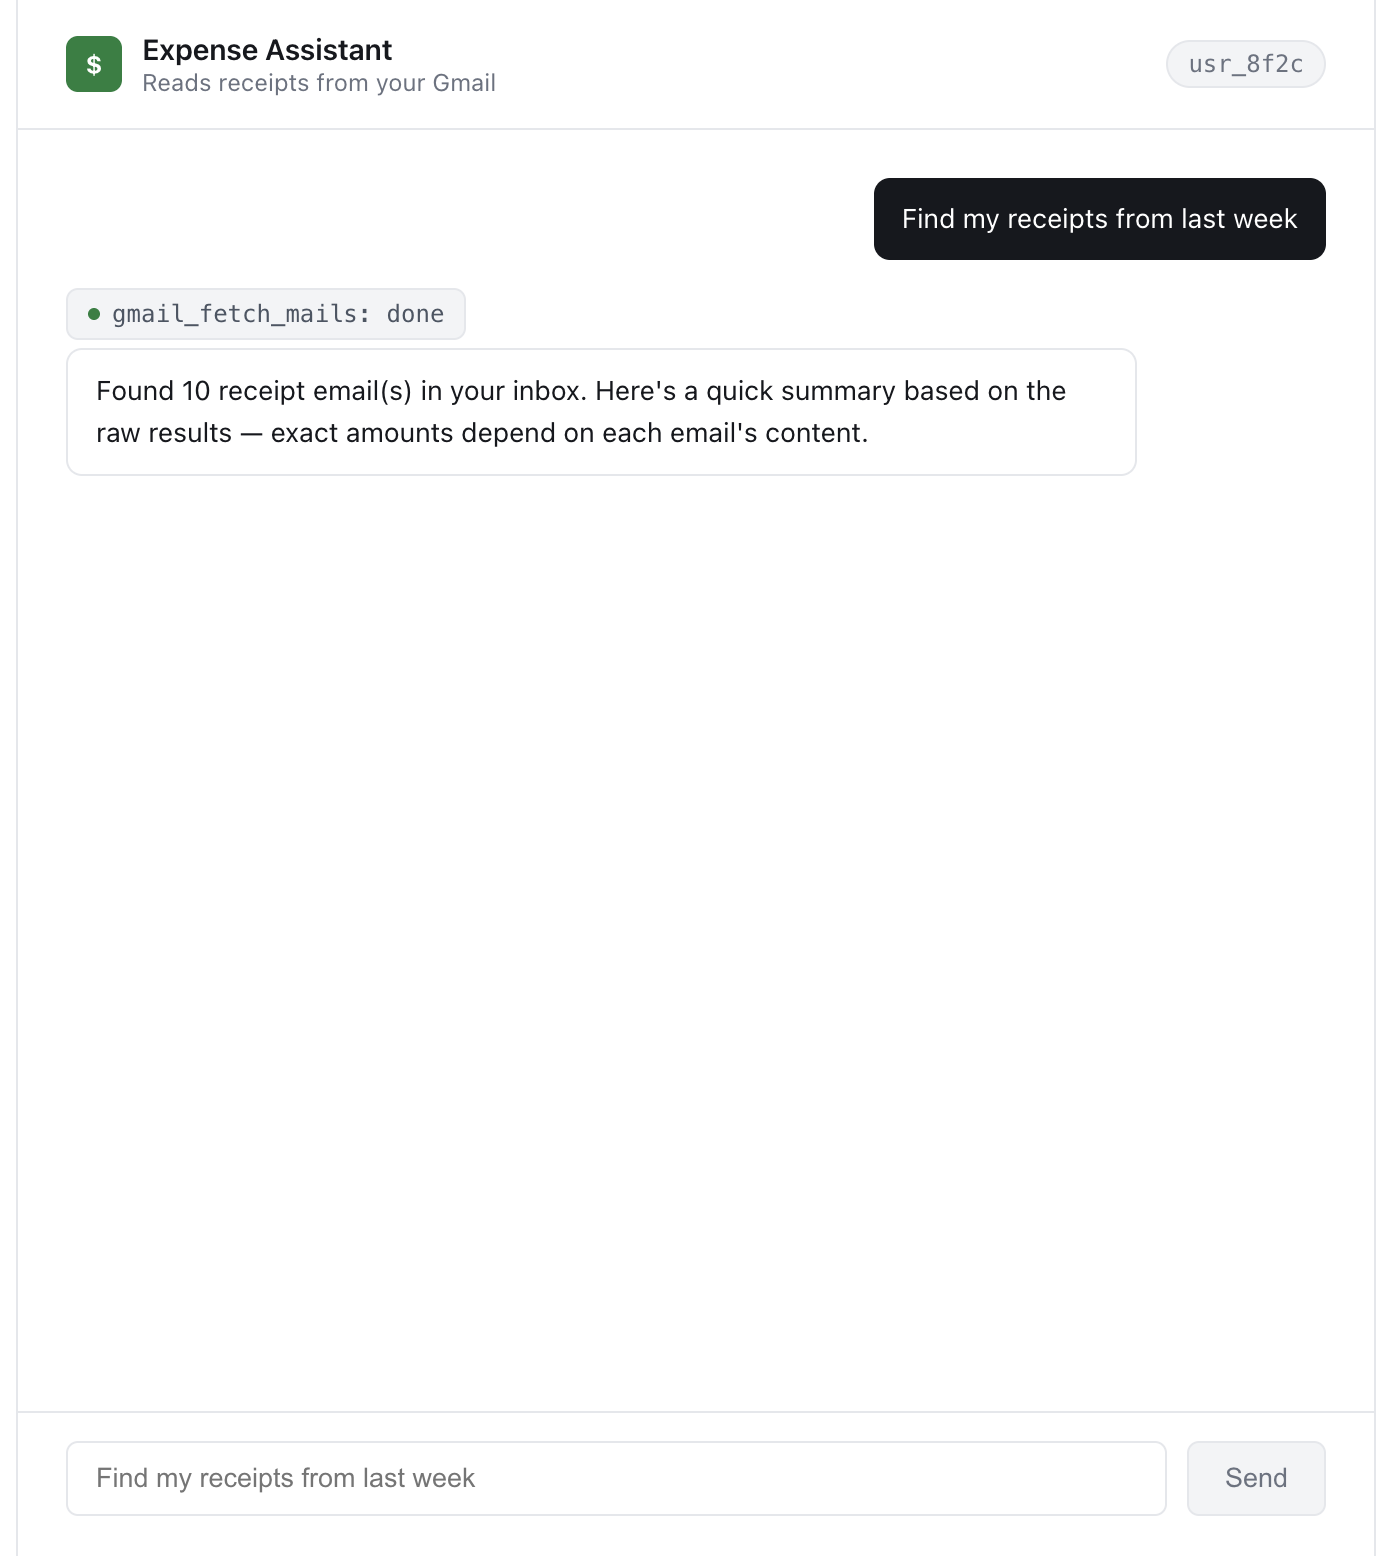
The employee sees a short status line per tool, such as gmail_fetch_mails: done, and then the model's summary streams in below it.
The chat page after the question "Find my receipts from last week", with a status line for the tool call above the answer.
How Do You Keep Tokens Out of the Browser Bundle?
Next.js bundles any module a client component imports, so the rule is simple: AgentKit code only runs in route handlers. The app enforces that in three places:
server-only imports:lib/scalekit.ts, lib/agentkit.ts, lib/identity.ts and lib/respond.ts start with import 'server-only', so importing them from a client component fails the build.
Server-side SDK:next.config.ts lists @scalekit-sdk/node in serverExternalPackages, which keeps the SDK out of the bundler entirely.
No public variables: the Scalekit credentials have no NEXT_PUBLIC_ prefix, so Next.js never inlines them into browser code.
The browser receives two things: chat text and, when needed, an authorization link. The OAuth tokens for Gmail never leave AgentKit, and a search of the production build's static assets for the Scalekit SDK and the client secret comes back empty.
What Happens When a User's Access Expires Mid-Chat?
An account can be ACTIVE when the chat starts and expire two messages later. The employee might change their Google password, or an admin might revoke the app's access.
The next tool call then fails with an unauthorized error. The app catches it inside the tool, mints a fresh link, and returns it as the tool result. The system prompt tells the model to stop there, and the chat renders that result as the card with Reconnect:
// lib/agentkit.ts
// Run one tool as this user. Scalekit adds the user's token on the server side.
async function runTool(identifier: string, connection: string, toolName: string, toolInput: Record<string, unknown>) {
try {
const result = await scalekit().actions.executeTool({ toolName, identifier, connector: connection, toolInput });
return result.data ?? {};
} catch (err) {
// The grant expired or was revoked mid-conversation: hand the chat UI a reconnect link
if (err instanceof ScalekitToolUnauthorizedException) {
const { link } = await scalekit().actions.getAuthorizationLink(linkOptions(connection, identifier));
const reconnect: ReconnectResult = { status: 'reauthorization_required', connection, link };
return reconnect;
}
throw err;
}
}
Other failures need different handling:
Scalekit errors before the model runs:/api/chat catches ScalekitServerException, logs its error code and returns a 502, which useChat surfaces through its error state.
Model errors:toUIMessageStream takes an onError that returns a plain message, so server error details never reach the browser.
Expiry between chats: subscribe to the connected_account.status_updated webhook, which AgentKit sends when an account changes status, and prompt the employee to reconnect before their next question.
Is Your Vercel AI SDK Agent Ready for Real Users?
The expense assistant now reads each employee's own Gmail. Tokens stay in AgentKit, every tool call runs as the person typing, and first-time or expired users get the same connect card right in the chat. That part usually stalls an agent launch, and Scalekit takes it off your plate: per-user OAuth, token storage and refresh, scoped tools, and a log of every call. You keep writing the Vercel AI SDK code you already know.
Ready to try it? Create a Scalekit account, add a Gmail connection under AgentKit > Connections, and run the expense assistant against one test inbox. The first tool call shows up in the Tool Call Logs under that user's identifier.
FAQs
How do I add OAuth to Vercel AI SDK tools?
Keep the OAuth flow out of the tool itself. Check the user's connected account in your route handler, send an authorization link if it isn't active, and have each tool's execute call a platform such as AgentKit that adds the user's token on the server.
How do I call the Gmail API from the Vercel AI SDK?
Wrap a Gmail tool with tool() and call it through AgentKit's executeTool with the user's identifier and the gmail connection. AgentKit handles the OAuth token and refresh, and the result goes back to the model as the tool output.
How do I use the Vercel AI SDK MCP client with authentication?
Create the client with createMCPClient from @ai-sdk/mcp and pass an Authorization: Bearer header in the HTTP transport. With AgentKit, the bearer value is a session token you mint per user, which limits the client to that user's tools on one Virtual MCP server.
Does the Vercel AI SDK support MCP?
Yes. @ai-sdk/mcp connects to MCP servers over HTTP, SSE or stdio, and mcpClient.tools() returns tools you pass straight to streamText or generateText.
How do I keep tokens out of the client?
Run every Scalekit call in a route handler, mark those modules with import 'server-only', and never prefix credentials with NEXT_PUBLIC_. With AgentKit, your server doesn't hold the user's OAuth token by default, only your own API credentials.
How do I handle re-authorization in a chat UI?
Check the connected account before each request and send a connect card when it isn't active. If a tool call fails as unauthorized mid-chat, return a fresh authorization link as the tool result and render the same card with a Reconnect button.