

Your agent needs to make, move, or export something in Canva. Canva now ships two distinct paths: a remote MCP server aimed at AI assistants, and the Connect API your integration may already call. They cover overlapping but genuinely different territory, they put you on different OAuth paths, and they impose different operational demands in production. This is the decision framework for agent builders.
Both surfaces reach the same Canva account, but they are built for different consumers and are gated differently. Here is what each one is before we compare them.
Canva provides a remote MCP server at mcp.canva.com/mcp, marketed as the Canva AI Connector. It exposes design generation, in-place editing, discovery, asset and brand management, export, and commenting as MCP tools so an assistant can act on a user's Canva through natural language. Authentication is per-user OAuth: Canva stores designs, assets, and permissions per user, not at the org level, so every user of your assistant authenticates individually. Read the details in Canva's official MCP documentation.
The Connect API is a REST interface at api.canva.com/rest/v1, covering designs, assets, autofill, brand templates, comments, folders, exports, design imports, merges, resizes, users, webhooks, and analytics. It authenticates with the OAuth 2.0 Authorization Code flow plus PKCE, using a registered integration (client_id and a client_secret that begins with cnvca). Access tokens currently expire after four hours; you refresh with a refresh token. Full reference lives in Canva's official Connect API documentation.
Scalekit exposes a single Canva connector, built on the Connect API, shipping 48 prebuilt tools over OAuth 2.0. There is no separate Scalekit "Canva MCP" connector to choose between; the connected-account model is the same whichever Canva surface you reason about. The setup and tool list are in the Scalekit Canva connector docs.
The choice is not "richer vs simpler." For Canva specifically, each path holds capabilities the other cannot reach, and the auth models diverge in ways that decide production viability. Four dimensions carry the comparison.
The table below maps the actions most relevant to agent use cases. Read it as a coverage map, not a scorecard; the right column depends on what your agent is for.
The unusual part of Canva is that neither surface is a strict superset. The MCP owns AI-native creation: generating a design from a prompt and editing an existing design in place through a start, perform, commit transaction cycle. The Connect API has no editing endpoint and no text-to-design generation, so those live only on the MCP path. Going the other way, the Connect API owns the operational surface: webhook notifications for real-time events, design view analytics, page merges, and direct byte uploads. If your agent reacts to changes or runs unattended, that surface is not optional.
There is no API-key shortcut on either path; both are per-user OAuth. The MCP recommends CIMD, where your client_id is an HTTPS URL pointing to a JSON document describing your client, so you avoid pre-registration and a client secret; DCR remains for backward compatibility but is deprecated. The Connect API uses Authorization Code with PKCE against a registered integration, with short-lived access tokens. If you are weighing these token models generally, see OAuth vs API keys for AI agents and the CIMD vs DCR guide.
Each path has a real gate before a non-trivial agent can connect. To point your own production agent or platform at Canva's remote MCP, you must apply to a waitlist to allowlist your redirect URI; end users of popular assistants get access, but your custom integration does not by default. On the Connect API path, your integration starts in draft and works only for your own team until you submit it for review and Canva approves it for production. Both gates are architectural, not paperwork you can skip.
On the MCP path, Canva runs the server, maintains the tool schemas, and normalizes responses; you still own per-user token storage, refresh, revocation on disconnect, and tenant isolation. On the Connect API path, you own the full stack: endpoint selection, error handling, pagination, retries, and the token lifecycle. The four-hour access-token expiry is the sharp edge here: a long-running or scheduled agent will hit expiry mid-run unless refresh is handled proactively. That failure mode is covered in how to handle token refresh for AI agents.
Reach for the MCP when the work is interactive and a user is present to authorize it.
Reach for the Connect API when the agent runs on its own or needs surface the MCP does not expose.
The path decision changes the token type. It does not change the infrastructure you need underneath it. This is the part that determines whether your Canva agent survives its second customer.
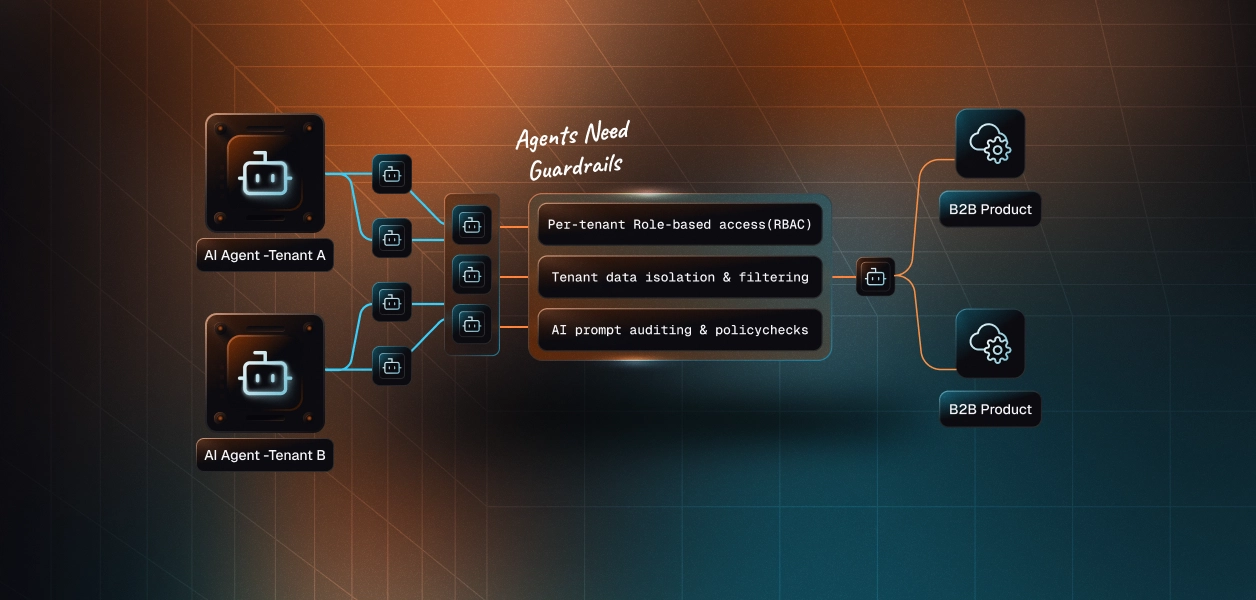
MCP OAuth gives you a token per user. Connect API OAuth gives you an access token and refresh token per user. In neither case do you get encrypted-at-rest storage, per-tenant isolation, rotation logic, or a revocation flow. Those are yours to build regardless of which surface you chose.
In a multi-tenant B2B agent, which is the norm rather than the exception, every user holds their own Canva credential. Fifty customers is fifty token lifecycles to store, refresh, and revoke. The Connect API's four-hour access tokens turn refresh from a background nicety into a correctness requirement, and employee offboarding creates a specific gap: the identity provider account is disabled, but a Canva token minted months ago and stored locally is still valid until someone invalidates it. For the wider pattern, see access control for multi-tenant AI agents.
Scalekit's Canva connector resolves the per-user connected account on every tool call, handling the OAuth flow, encrypted token storage, and refresh for the four-hour token, so credentials never touch the agent runtime. The same auth infrastructure works whether you reason about the MCP surface or call the Connect API directly; the path decision does not change what you need at the credential layer.
The fastest way to see the model is to build one. This walkthrough connects a user's Canva account, loads only the tools that user authorized, and runs an agent loop with LangChain. Prerequisites: a Scalekit account, the Canva connection configured in the dashboard, and your Scalekit credentials in .env.
Install the SDK and create a client. The client reads your Scalekit environment URL, client ID, and client secret from the environment.
Before the agent can act, the user authorizes their Canva account once. Scalekit returns a link; send the user through it, and Scalekit stores the resulting connected account against your identifier.
Now load the tools. The agent does not receive a flat catalog of all 48 Canva tools; it receives the tools this user's connected account is authorized to call, mapped straight into LangChain structured tools. Cutting the surface from 48 to the handful the task needs reduces token overhead and improves tool selection; more on that in LangChain tool calling.
Bind the scoped tools to a tool-calling model and run. Every Canva call the agent makes executes under this user's connected account, not a shared credential.
If your stack is Node, the connected-account model is identical. Authorize once, then call a specific tool by name against the user's connection.
The connector removes the credential work, but the reason to route Canva through Scalekit goes past auth plumbing. Three things matter once the agent leaves your laptop.
Because every Canva call resolves through a per-user connected account, each tool invocation is attributable to the user who authorized it. That gives you downstream tool-calling logs for who did what, when, under whose credentials, which is exactly what a security reviewer asks for. See agent tool observability for the full picture.
If your agent uses Canva alongside other tools, a Virtual MCP server gives it a scoped, per-user MCP endpoint declaring exactly which tools it can see and whose credentials it acts with, with no MCP server to deploy, host, or maintain. One server definition serves all users; each run gets a short-lived session token scoped to that user's connected accounts. This is also the clean way to expose Canva to an assistant without going through Canva's redirect-URI waitlist. Start with the Virtual MCP overview and the Virtual MCP deep dive.
The same connected-account model underpins Scalekit's agent templates, from outbound and content workflows to multi-tool orchestration. Browse the wider set on the Scalekit connectors directory, and compare adjacent design tooling in the Figma MCP vs API breakdown. Pricing for scaling this across tenants is on the Scalekit pricing page.
If your Canva agent is interactive and its core job is generating or conversationally editing designs with a user present, the remote MCP is the faster route, and it is the only path to AI generation and in-place editing. If your agent runs unattended, reacts to events, needs analytics or merges, or acts across many customer accounts, build against the Connect API, since webhooks, analytics, and headless execution live only there. Most production products end up using both: the MCP for user-facing creation and the Connect API for background pipelines. Whichever surface you pick, the per-user credential problem is identical, and that is the layer that needs production-grade infrastructure.
Building Canva agents and want a second opinion on the auth model? Join the Scalekit community on Slack or reach an engineer through the Talk to us page for immediate help.
Set up the connector from the Scalekit Canva connector docs, or see it on the Canva connector page.