Secure token management for AI agents at scale


TL;DR
- Naive .env handling works for single-agent scripts but quickly becomes a liability when secrets are copied, shared, or logged across environments.
- LangChain improves orchestration and structure, yet still depends on static, developer-managed tokens, offering clarity without real security.
- Scalekit replaces local keys with scoped, short-lived tokens issued by a centralized vault, enabling rotation, auditability, and least-privilege access.
- The result: agents stay lightweight, secure, and compliant, no hardcoded credentials, no hidden risks, just clean, scalable authentication
Introduction: From quick scripts to scalable security
Every developer has, at some point, taken the fastest path to getting an API call working: drop a few credentials into a .env file, write a quick Python script, and hit “run.” It works, it’s simple, and it’s dangerous. The problem rarely appears on day one. It shows up when the script becomes a workflow, the workflow becomes a service, and suddenly multiple agents are using the same credentials with no visibility, rotation, or audit trail.
This pattern is especially common in AI agents that depend on multiple external connectors, such as HubSpot, Slack, Notion, or Salesforce, where each service requires a separate key or refresh token. When those agents scale across environments or users, the hidden cost of convenience surfaces fast: expired tokens, overwritten .env files, and security reviews full of red flags.
That’s where our story begins, with a small agent designed to fetch HubSpot contacts and summarize them with LangChain. The first version “just works,” but it stores everything locally, updates tokens by rewriting .env, and assumes no one else is touching the file. As soon as it runs in a multi-agent or multi-user setup, it collapses under its own simplicity.
This blog follows that exact evolution from a naive, local .env setup to a governed, token-vaulted architecture using Scalekit. We’ll use HubSpot as the running example, but the principles apply to any agent connecting to external APIs. Along the way, you’ll see how LangChain orchestrates logic cleanly, yet still inherits the same token fragility, and how Scalekit changes the equation entirely by introducing scoped, auditable tokens that scale as fast as your agents do.
Bridging context: From concept to hands-on example
To ground these ideas in something tangible, let’s turn theory into practice. Imagine you’re building an internal automation agent designed to fetch customer data from HubSpot, maybe a simple contact retriever that powers dashboards or triggers workflows.
Like most developers, you’d start small. You’d reach for a .env file, drop in a few tokens, wire up some Python code, and celebrate the first successful API call. It’s quick, it works, and it feels like progress until the first token expires or multiple agents begin competing for updates.
That’s exactly where our story begins: taking that convenient but fragile setup and evolving it into a secure, scalable, and auditable token management model. We’ll use HubSpot as our running example to walk through the full journey from naïve token storage to centralized, rotation-ready secret handling using ScaleKit.
Before diving into architecture and best practices, let’s first set up HubSpot so you can follow the flow end-to-end, generating credentials, obtaining tokens, and wiring everything into your environment.
Getting started: Setting up HubSpot and Scalekit for secure token access
Before getting into the implementation, it’s important to establish a proper foundation for secure access. In this walkthrough, we’ll use HubSpot’s CRM API as the core example because it represents a real-world environment where agents interact with multiple connectors that rely on OAuth authentication, rotating tokens, and scoped permissions.
Alongside the native token-based setup, we’ll also integrate Scalekit, which provides a centralized, auditable way to manage and rotate tokens without embedding them directly into code or environment files. This combination reflects how most modern agent systems operate in production, balancing developer convenience with enterprise-grade security and compliance.
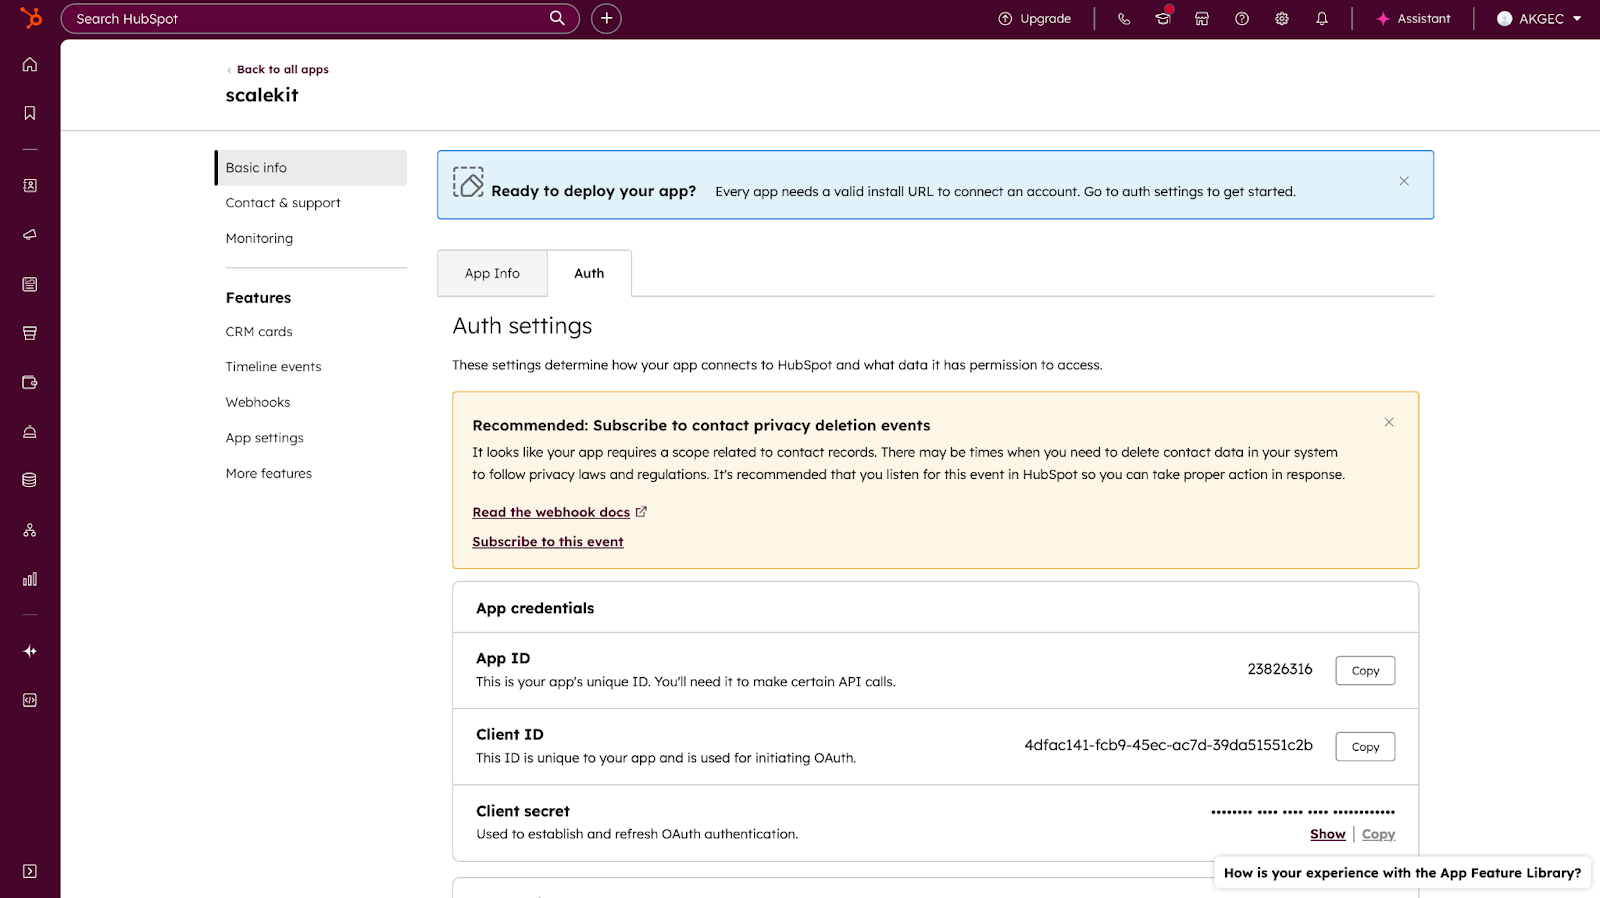
1. Create a HubSpot developer account
- Visit developers.hubspot.com and sign in with your HubSpot account.
- Under Apps > Create App, you’ll receive a Client ID and Client Secret.
- These credentials uniquely identify your application and are required to request OAuth tokens.
2. Configure the redirect URI
While setting up the app, HubSpot requires a Redirect URI to complete the OAuth flow.
This is the endpoint HubSpot will redirect to after the user authorizes access. Your agent or backend receives the authorization code here.
If you’re testing locally, set the redirect URI as:
http://localhost:3000/oauth/callback
If you’re integrating via Scalekit (recommended for secure token management and multi-connector workflows), use the redirect URI provided in your Scalekit configuration.
3. Add your client credentials
Once your redirect URIs are configured, the next step is to set up client credentials securely. These values allow your application to authenticate and exchange OAuth tokens, forming the foundation of both the HubSpot and Scalekit flows.
For HubSpot (Direct token-based setup)
If you’re connecting directly to HubSpot’s OAuth API, add your credentials to the .env file alongside your access and refresh tokens:
These variables allow your agent to refresh tokens and authenticate API calls directly with HubSpot. However, since these secrets are stored locally, it’s critical to restrict access to the .env file and avoid committing it to version control.
For Scalekit (Centralized token and secret management)
When using Scalekit, you don’t store or refresh tokens manually. Instead, you configure credentials once through the Scalekit dashboard, and Scalekit securely handles rotation, encryption, and access scoping.
Add your Scalekit settings to the .env file (or environment configuration for deployment):
Scalekit ensures that all tokens are:
- Rotated automatically before expiry,
- Scoped by organization or user to enforce least privilege, and
- Never written to disk or shared between environments.
This setup forms a secure, auditable foundation for all subsequent agent interactions with HubSpot or any connected service.
4. Generate access and refresh tokens
Once your Client ID, Client Secret, and Redirect URI are configured, you’re ready to exchange the authorization code for actual tokens, the credentials that let your agent call HubSpot’s API.
For HubSpot (manual OAuth flow)
1 . Visit the following authorization URL in your browser (replace the placeholders):
2. Approve the app
3. HubSpot will redirect you to your redirect URI with a code in the URL (for example:
http://localhost:3000/oauth/callback?code=ABC123XYZ...)
Use that code to request your tokens:
1. You’ll receive a response like:
2. Copy these tokens into your .env file:
For Scalekit (managed token generation)
If you’re using Scalekit, the process is fully managed.
1. Log in to your Scalekit dashboard
2. Navigate to Connected Accounts → HubSpot → Connect
3. Approve access through HubSpot’s OAuth prompt
4. Scalekit automatically stores your tokens in its vault and exposes a single identifier for your application to use
This identifier replaces your tokens in code, meaning your agents no longer need to handle ACCESS_TOKEN or REFRESH_TOKEN directly, a massive step toward secure, scalable token management.
The naive beginning: Hardcoded and fragile tokens
The first working version of any agent script often starts with simplicity: drop your tokens in a .env file, load them with dotenv, and move on. It feels harmless at first: the script works, API calls succeed, and you get the desired output. But beneath that comfort lies an invisible trap: you’ve just coupled authentication, storage, and logic into one file.
Our HubSpot contact-fetching agent began exactly this way. The goal was small: fetch a list of contacts using HubSpot’s CRM API. Here’s the basic setup most developers start with:
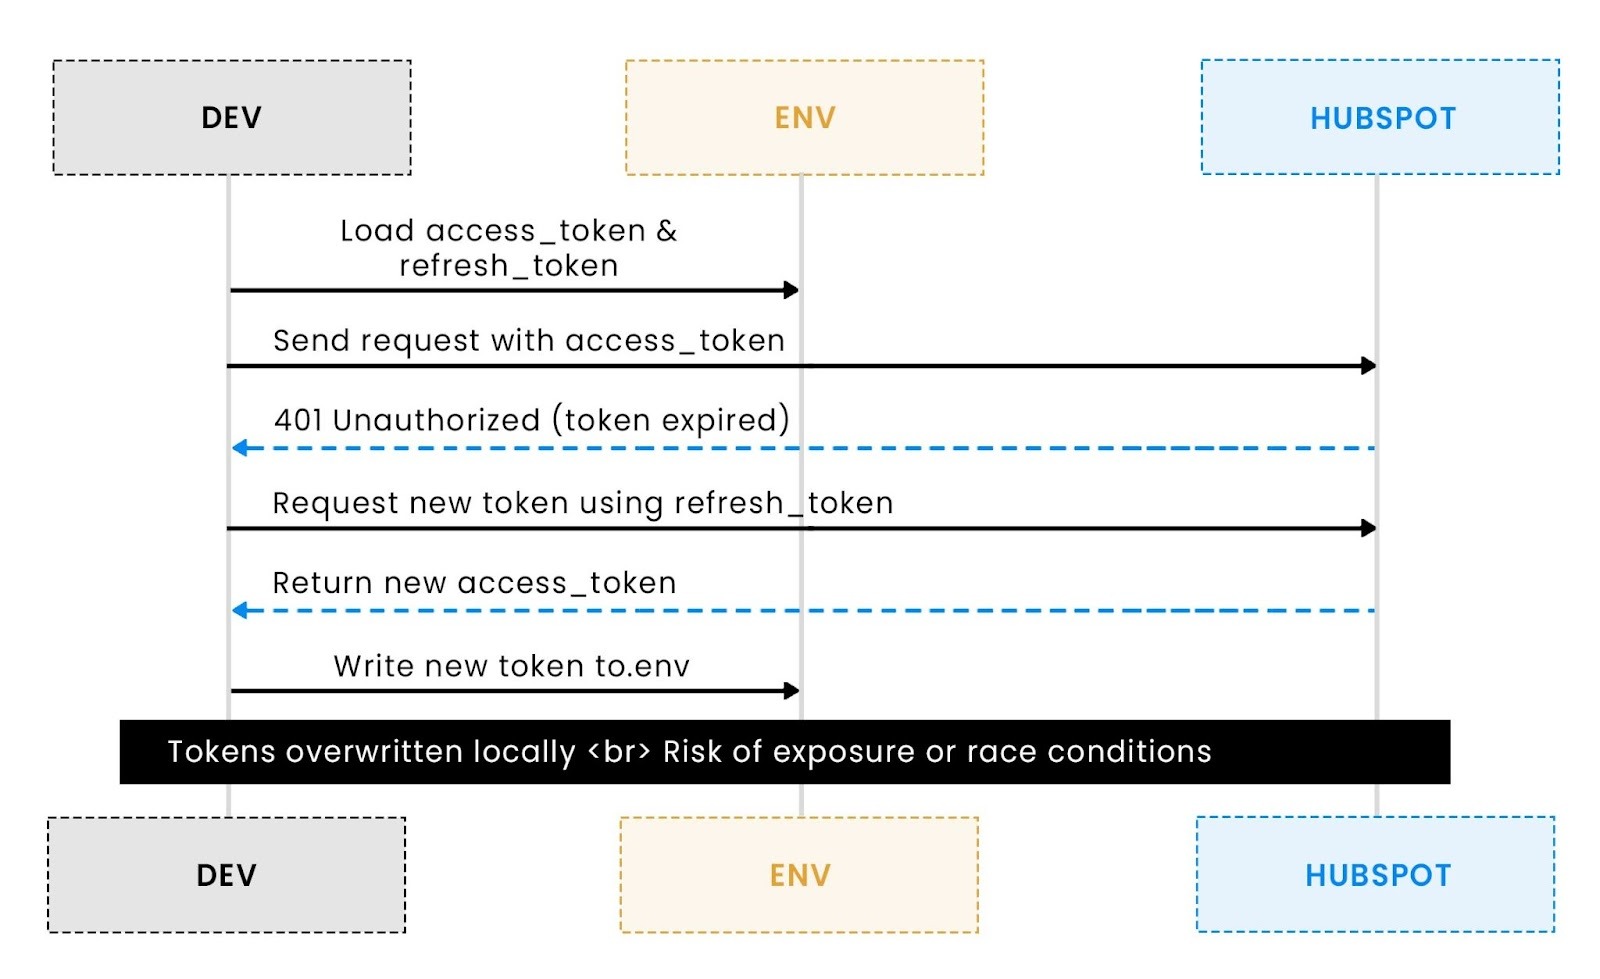
It works until it doesn’t expire. Once the access token expires, every agent that depends on it fails silently or starts returning 401 errors. So, naturally, you add “token refresh logic.” But since this script doesn’t separate concerns, you end up writing a token manager, API client, and persistence layer all in one place.
It now refreshes automatically, but it also writes secrets back to disk. When multiple agents run in parallel or different environments share the same .env file, race conditions and token overwrites are guaranteed. A CI/CD job might refresh one token just as another job invalidates it, causing inconsistent failures across runs.
The problem here isn’t the API or the code, it’s the design. By baking secrets directly into the environment file, you lose:
- Isolation: Every process reads and writes the same key.
- Auditability: you never know when a token changed or by whom.
- Security posture: tokens remain long-lived, full-access, and easily exposed.
This “naive agent” does exactly what it’s told, but it can’t distinguish between who is using the token or why. Before scaling to multiple agents, users, or teams, this model breaks down.
Next, we’ll look at how we tried to clean this up using LangChain orchestration, improving structure and observability, but still relying on the same fragile foundation.
Adding structure with LangChain: Organized, but still insecure
Once the single-script chaos became unmanageable, the next natural step was to bring structure, and LangChain offered exactly that. Its orchestration model lets you break workflows into deterministic steps: fetching tokens, making API calls, waiting, simulating expiry, and retrying in sequence.
The goal wasn’t to reinvent token handling, yet it was to prove that a structured flow doesn’t automatically mean a secure one.
This pipeline demonstrates what LangChain does best: orchestrate logic transparently. Each step is observable, debuggable, and controlled. You can trace exactly when the token expired, when it was refreshed, and what data was fetched before and after.
However, the core vulnerability remains untouched: the naive_agent still manages credentials through .env reads and writes. The orchestration makes failures predictable, but it doesn’t make them safer.
The result is a “better organized” version of the same flawed model. It’s like cleaning up a workshop, but leaving exposed wires underneath the process looks tidy, yet the underlying risk hasn’t changed.
LangChain makes it easier to integrate retries, simulate token expiry, or throttle API calls, but the tokens themselves still live and die in plaintext. In a multi-user environment, this means any developer (or even a misconfigured test) can overwrite or leak credentials without detection.
The takeaway is clear: structure improves maintainability, not security. Before going to production, we need to decouple secrets from local files and introduce scoped, auditable access for every connector.
That’s where Scalekit enters the story, offering centralized, policy-driven token management that finally closes this loop.
Scaling securely with Scalekit: Centralized tokens, Local freedom
After seeing how LangChain improved orchestration but left token management fragile, the next evolution was clear: we needed a central authority for tokens. A system where credentials weren’t stored locally, tokens could rotate safely, and agents could act within scoped, auditable limits. That’s exactly what Scalekit delivers.
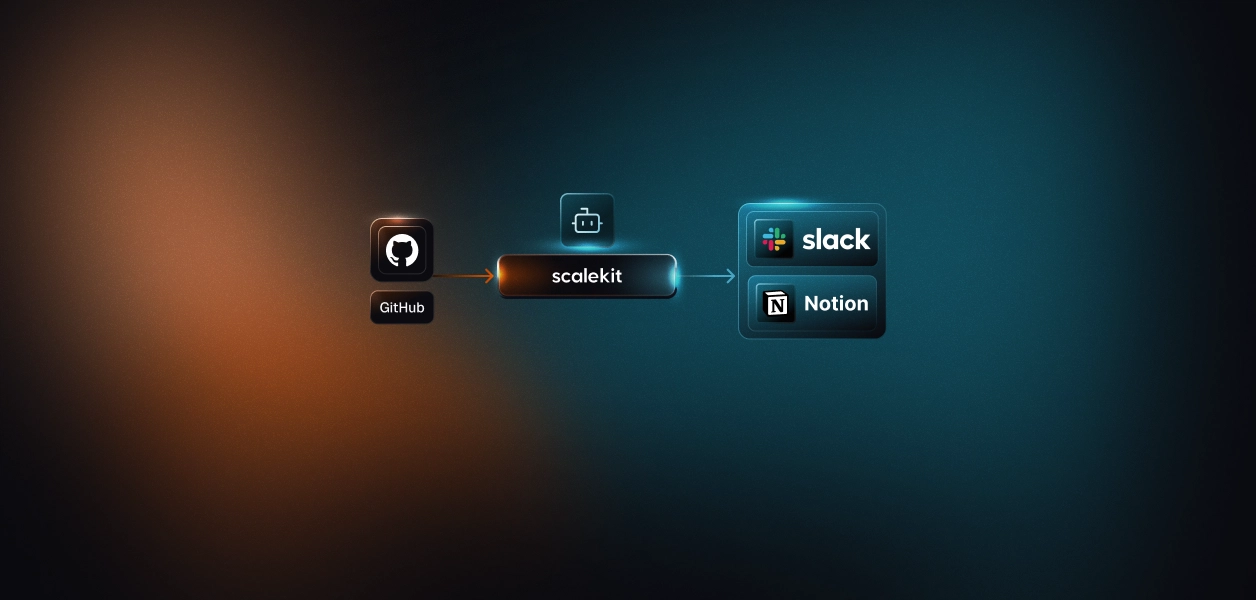
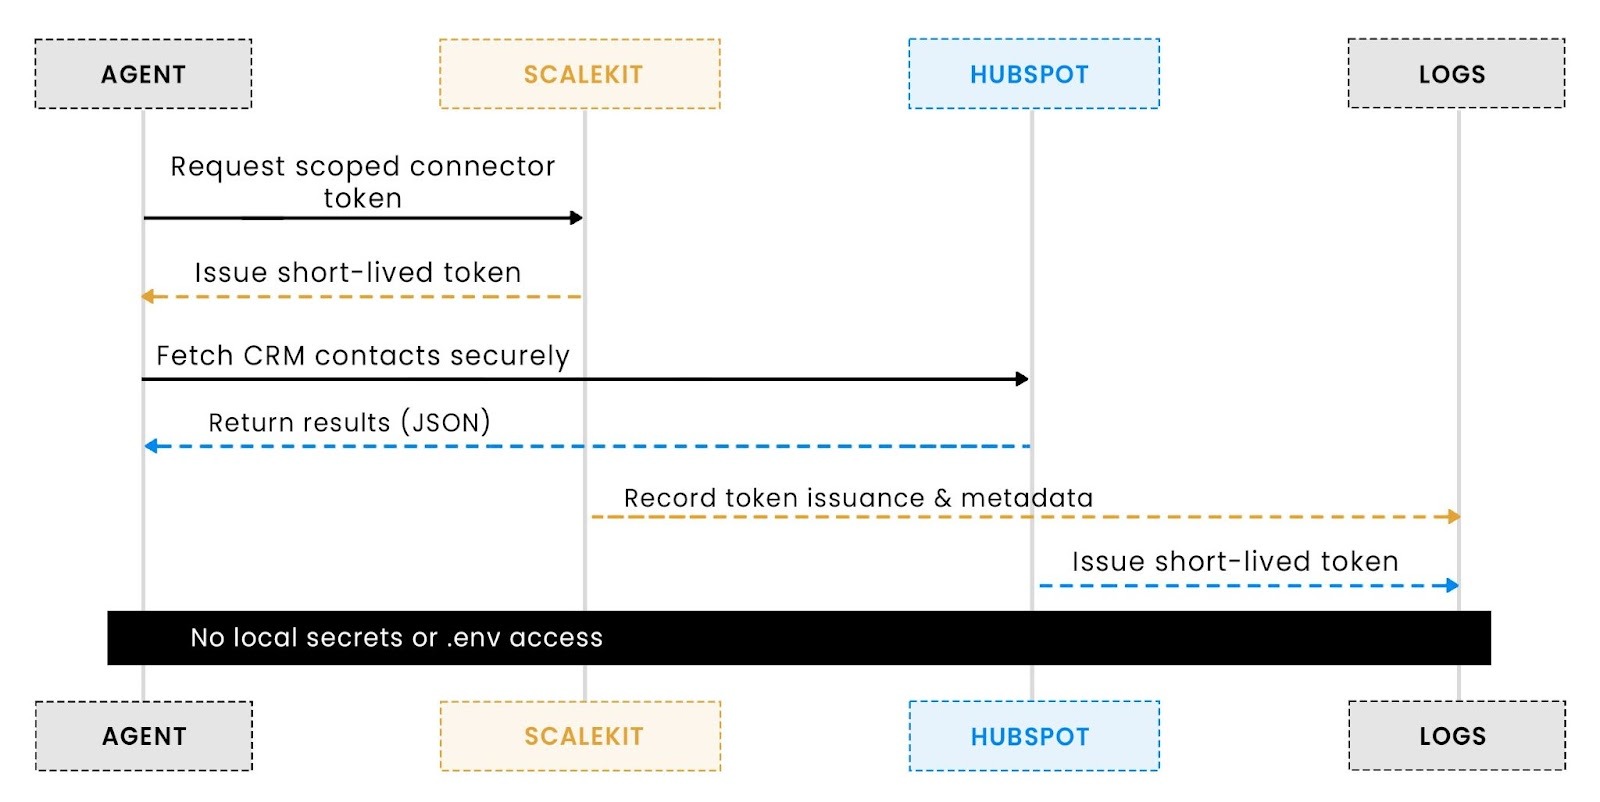
Instead of each agent owning credentials, Scalekit introduces a token broker model. Think of it as a unified identity layer for all your connectors, HubSpot, Slack, Notion, and beyond. Every agent authenticates once, retrieves a temporary scoped token, and never touches .env again.
This implementation uses client credentials to authenticate with Scalekit once and retrieve scoped tokens for specific tools like HubSpot. The connector itself handles retries and token reuse internally, eliminating the need to store or refresh tokens manually.
When it’s time to fetch contacts, the agent simply calls the HubSpot tool within Scalekit:
Notice how no API keys or refresh tokens appear anywhere. The agent doesn’t even know what token it’s using, only that it’s allowed to perform a specific action (in this case, hubspot_contacts_list). That’s what makes the Scalekit model both secure and scalable: agents no longer share long-lived tokens or manage secrets directly.
In practice, this means:
- Centralized governance: admins can revoke or rotate tokens globally.
- Scoped access: each connector only sees what it’s authorized to use
- Fewer secrets: .env files only store non-sensitive client credentials.
This shift fundamentally changes the developer experience. Instead of copying API keys into every agent, you build connectors that request permissions dynamically, almost like OAuth for your internal automation layer.
It’s not just cleaner code, it’s a foundation for sustainable, secure, and scalable operations across every environment.
Integrating secure tokens into workflows without adding orchestration first
For the HubSpot example in this post, you do not need LangChain at all. Scalekit already handles authentication, short-lived tokens, rotation, and retries, so the simplest and safest path is to call the connector directly and keep your script focused on business logic. Your scalekit_hubspot_flow.py does exactly that: initialize ScalekitConnector, pass the SCALEKIT_IDENTIFIER, and fetch contacts through the managed HubSpot tool. No =secrets live in .env beyond Scalekit app credentials, and no token parsing or refresh code appears in your agent.
Why this matters for a baseline: fewer moving parts, fewer failure modes, and no orchestration layer to debug while you are validating scopes and data access. It also keeps responsibility boundaries clean. Scalekit owns the identity and token lifecycle. Your code owns what to fetch and how to use it. Start here, then add orchestration only when there is a concrete need, such as multi-step reasoning, branching, or human-in-the-loop review.
When to layer LangChain on top of Scalekit
If your workflow grows beyond a single fetch, LangChain becomes useful as a thin, explicit controller. Examples include chaining guarded steps, introducing timeouts and cancellations, or attaching tool-level guards. In those cases, keep Scalekit as the identity plane and let LangChain coordinate steps. The pattern is simple: a runnable step calls your existing Scalekit function, returns a structured status, and the pipeline composes these steps.
This wrapper adds scheduling, retries, and composition without reintroducing token handling. Scalekit continues to mint and rotate scoped tokens behind the scenes, while LangChain only sequences steps. If you later add enrichment, validation, or publishing stages, follow the same shape by creating small runnables that each call a Scalekit tool or a local function, then compose them into a clear, testable flow.
Comparing secure vs. Naive token handling
Once both approaches are in place, the difference becomes immediately clear. The naive .env setup may look simple, but it pushes secrets everywhere onto developer laptops, CI runners, and local environments. Scalekit’s centralized token model replaces this sprawl with a managed identity layer that’s safer, more traceable, and far easier to scale.
In practice, this single architectural change eliminates entire classes of security risks: no more long-lived keys, no more manual refresh logic, and no accidental token exposure through logs or commits. Teams gain both operational visibility and peace of mind, knowing every token is scoped, rotated, and revoked under policy control.
Key takeaways and recommendations for secure token management
We’ve now walked the full journey, from a brittle .env script that hardcodes long-lived API keys to a secure, auditable, and automated token orchestration model using Scalekit. This section ties it all together, turning those lessons into practical recommendations that developers can apply to any multi-connector or agent-based system.
1. Eliminate hardcoded tokens early
Once your workflow moves beyond experimentation, storing tokens in .env files becomes a major liability. Static secrets persist in source control and logs, often grant excessive permissions, and bypass rotation or expiry policies. Moving authentication to a managed service like Scalekit, Vault, or GCP Secret Manager ensures that short-lived, scoped tokens are issued dynamically. This removes sensitive data from codebases and prevents accidental exposure across environments.
2. Delegate token lifecycles to a broker
Manual token rotation, refreshing, and persistence quickly becomes unmanageable as systems grow. Scalekit abstracts this process through its token broker, where workflows request connector tokens instead of raw credentials. Each connector automatically enforces scopes, issues temporary tokens, and logs actions for audit and debugging. This creates a predictable, traceable security layer where every request is verified, short-lived, and accountable.
3. Design around least privilege
A strong security posture depends on limiting access to only what is necessary. Scoped tokens make this easy by granting permissions at the connector or operation level. For instance, an agent fetching HubSpot contacts should only have read access to CRM data, not full account privileges or write permissions. Each workflow operates within its defined boundary, preventing accidental misuse of tokens and reducing the impact of any security incident.
4. Make observability a default, not an afterthought
Visibility into token usage should be built into the system, not added later. Every token creation, refresh, or revocation event should be logged automatically. Scalekit’s audit trails make it easy to understand when tokens were issued, who used them, and what endpoints they accessed. This transparency allows for faster troubleshooting and compliance monitoring without any additional instrumentation.
5. Keep the developer experience lightweight
Security should never come at the cost of agility. With Scalekit, developers can keep local testing simple while security logic stays in the broker layer. There is no need for custom refresh logic or secret management in CI/CD pipelines. The authentication process remains the same across local and cloud environments, providing a consistent, frictionless experience for both developers and operators.
6. Think in terms of systems, not scripts
As your automations grow to include CRMs, communication tools, and analytics APIs, token management must evolve into a system-level discipline. Scalekit provides a single control plane that unifies vaulting, policy enforcement, and connector authentication. Every agent operates under the same security model, with centralized oversight and rotation policies that scale with organizational complexity. This approach reduces maintenance overhead, improves compliance, and enables teams to focus on building instead of firefighting credentials.
In the long run, this shift from local secrets to centralized identity governance not only strengthens security but also simplifies how agents, tools, and workflows interact. Secure token management becomes the foundation for scalable, maintainable, and compliant automation.
Conclusion: From copy-pasted keys to controlled access
This journey began with a common developer habit of dropping API keys into .env files and hoping for the best.
It’s simple, fast, and gets you moving. However, as the system expands with multiple connectors, automated workflows, and distributed agents, that simplicity becomes a risk. Tokens become stale, secrets leak, and debugging who accessed what becomes a nightmare.
By transitioning to a centralized token vault model, you’ve seen how teams can regain control and still move fast.
Scalekit’s broker-based authentication replaces scattered credentials with dynamic, short-lived tokens, while LangChain orchestrates these secure calls transparently across agents and workflows.
The result is a design where security, scalability, and developer experience coexist, every token traceable, every request scoped, and every action compliant.
What started as an insecure .env file ends up as a production-ready token lifecycle that is governed, auditable, and built for growth.
What to explore next
If this architecture resonates with your current setup or roadmap, here are some directions to extend it:
1. Integrate token scopes per agent: Assign separate scopes (read-only, writer, admin) to each agent to align capabilities with responsibilities. For example, your “Writer” agent shouldn’t access CRM exports, and your “Analyzer” agent shouldn’t post to Slack.
2. Introduce multi-connector agents: Extend your agent workflow to securely integrate multiple connectors, Slack, Notion, HubSpot, or Jira, all managed by Scalekit’s single trust layer.
3. Monitor via observability pipelines: Forward token usage logs from Scalekit to your APM tool (like Datadog or Grafana) for complete visibility across runs.
4. Simulate expiry and recovery flows: Test your resilience by intentionally expiring tokens in staging environments and validating that agents self-recover without manual resets.
FAQs
1. How does Scalekit differ from using environment variables or secret managers?
Traditional secret managers only store and retrieve long-lived tokens. Scalekit acts as a broker, dynamically issuing scoped, short-lived tokens for each connector. It manages refreshes, auditing, and revocation automatically, no static keys or manual rotation needed.
2. What happens if a Scalekit-issued token expires mid-run?
Scalekit’s connector client detects expiry and silently refreshes the token before retrying the operation. Your LangChain workflow continues without interruption, and the refresh event is logged for audit visibility.
3. Can this model support multi-tenant or team-specific connectors?
Yes. Scalekit supports scoped identifiers (org, team, user) so that different agents or departments can access only the data they’re permitted to. It’s designed for least-privilege, multi-tenant systems from the ground up.
4. What about developers who prefer local testing?
You can still run everything locally. Scalekit’s client authenticates using your environment credentials once, and all downstream tokens are ephemeral, hardcoded API keys, no reconfiguration, just one secure workflow from laptop to production.
5. How does this scale across frameworks like LangChain or CrewAI?
Because Scalekit operates as a framework-agnostic token broker, it integrates seamlessly with any orchestration layer, whether that’s LangChain, CrewAI, or a custom Python agent. The tools and connectors remain identical; only the orchestration style changes.