Developer's guide to building SSO solutions with GoLang


Why add SSO to your Go applications?
Enterprise software applications rely on Single Sign On (SSO) to improve user access, security, and user experience. From Slack to Notion, users expect seamless authentication without logging into each tool separately.
Features like social login, which allow users to authenticate using existing social media accounts such as Facebook, Twitter, Google, or LinkedIn, further enhance user convenience in SSO-enabled applications. Companies use credential providers like Okta and Entra ID to streamline access control and reduce password fatigue.
For Go developers, implementing SSO using OpenID Connect (OIDC) or SAML manually is complex. You have to parse XML, manage access tokens, handle sign in session logic, and debug response errors. Go’s simplicity doesn’t extend to the authentication workflow, making it tedious and error-prone.
Scalekit's Go SDK abstracts the Single Sign-On logic while giving you full control over session management and user logout. It supports any Go framework—net/http, Gin, or Fiber—letting you focus on building features, not fixing auth bugs.
What this guide covers
By the end of this guide, you’ll have a fully functional SSO login flow integrated into your Go application using Scalekit. To achieve this, follow the following steps:
- Redirect users to their identity provider (e.g., Okta or Entra ID)
- Handle authentication callbacks and extract user identity details
- Set secure session cookies using idTokens
- Authenticate API requests with accessTokens
- Test the whole flow locally using a built-in IdP simulator
The old way: Building SSO in Go manually
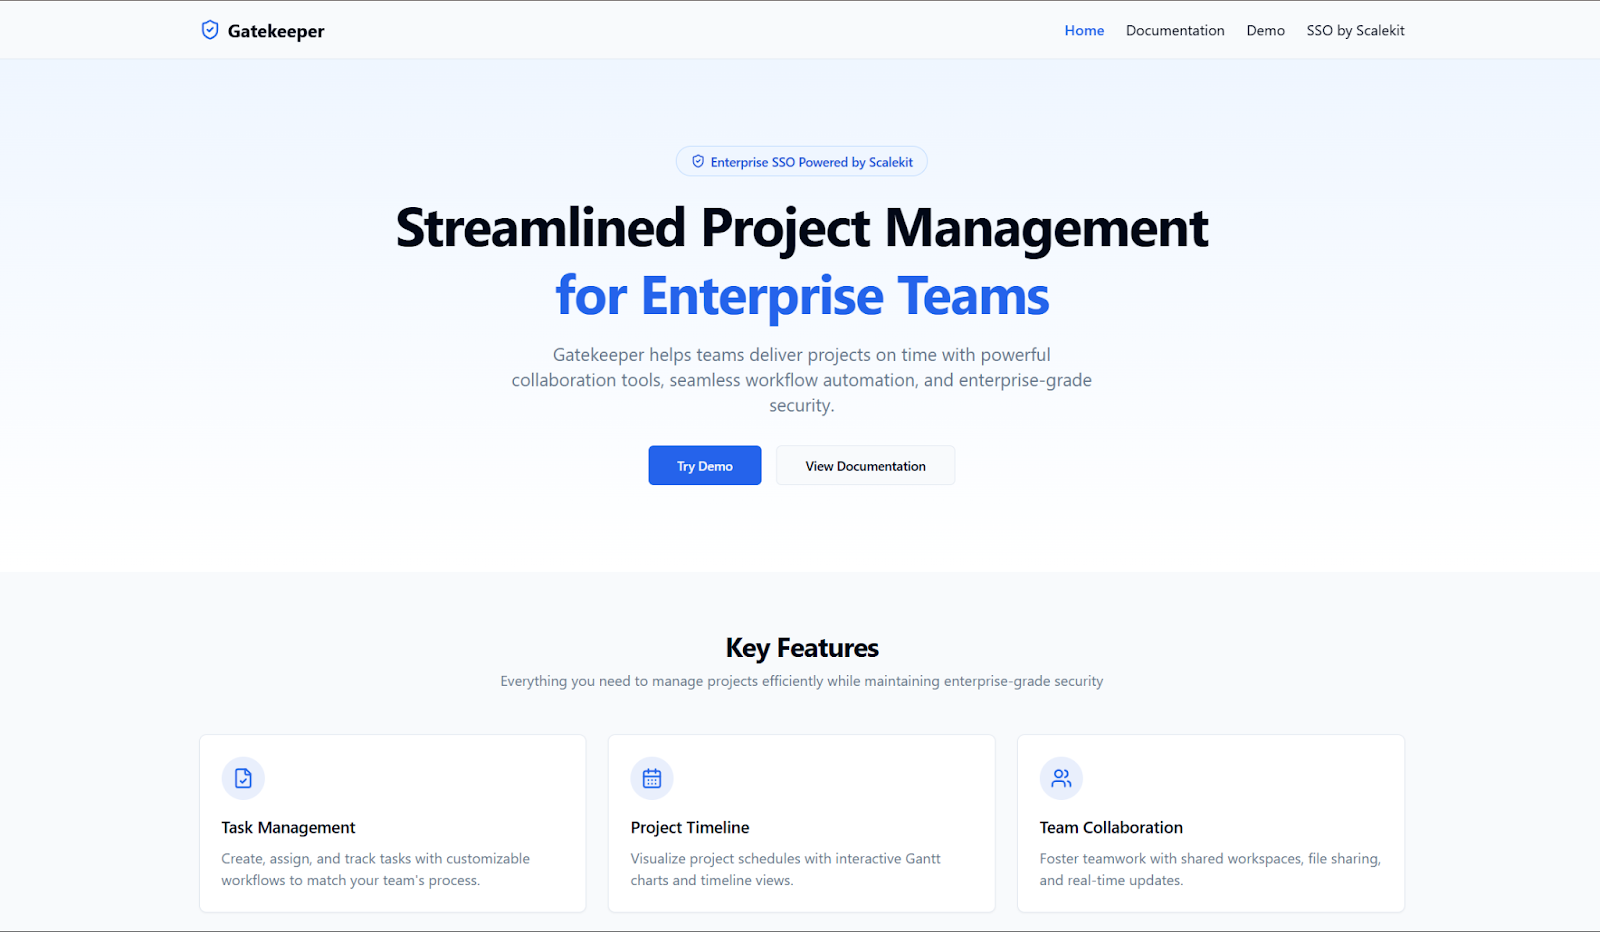
Example: Gatekeeper’s login failures
Gatekeeper, a fictional project management SaaS, faced a major roadblock while integrating SSO for its enterprise clients. Their engineering team initially chose to implement SSO manually using SAML libraries in Go, believing it would offer greater flexibility. However, the process quickly became overwhelming.
In SAML authentication, the service provider (SP) is the application—like Gatekeeper—that delegates user authentication to an external identity provider (IdP). The service provider relies on the IdP to verify user identities, enabling single sign-on and secure data exchange between the two parties.
Each client used a different IdP—Okta, Entra ID, and others—forcing the team to maintain multiple, complex configuration files. The token validation logic varied across providers, requiring constant adjustments to authentication flows.
Their engineering team initially wrote custom SAML authentication for each client, leading to:
- Multiple IdP configurations: Each customer used a different identity provider (IdP like Okta, Entra ID, etc.), requiring separate XML-based configs.
- Custom token parsing: Manually verifying SAML assertions and OAuth tokens increased complexity.
- Inconsistent login flow: Each IdP had its own quirks, leading to broken authentication flows.
If Gatekeeper had implemented SSO with Scalekit, they could have avoided the above complexities and saved days of engineering bandwidth. Let's take a look at how Scalekit makes this possible.
How Scalekit works behind the scenes
Scalekit streamlines SSO authentication in Go by handling the entire authentication lifecycle, so you don’t have to deal with protocol intricacies. Here’s how it works:
- Abstracts SAML and OIDC complexity: No need to parse SAML assertions or manually handle OAuth token exchanges—Scalekit manages authorization server interactions for you, so you don’t have to configure or maintain the authorization server yourself.
- Handles IdP redirections: Users are seamlessly redirected to their assigned IdP for authentication
- Fetches user identity details: Once authenticated, Scalekit returns user attributes (e.g. email, roles) without extra processing
- Works with any Go framework: Supports net/http, Gin, Echo and others, making integration flexible
- Includes an IdP simulator: Simulate SSO flows locally before connecting a real enterprise IdP
Understanding OpenID Connect in SSO
OpenID Connect (OIDC) is a modern authentication protocol designed to make single sign on (SSO) both secure and user-friendly for web and mobile applications. Built on top of OAuth 2.0, OIDC adds a robust identity layer, allowing applications to verify user identities and retrieve basic profile information in a standardized way.
In the context of single sign on SSO, OpenID Connect empowers users to access multiple applications using a single set of credentials. This means that once a user logs in through a trusted identity provider, they can seamlessly access protected resources across all connected services—eliminating the hassle of managing separate usernames and passwords for each app. For B2B SaaS platforms, this not only streamlines the user experience but also strengthens security by centralizing authentication and reducing the risk of password fatigue.
By leveraging OIDC, developers can implement authentication flows that are both secure and scalable. The protocol ensures that sensitive account information is exchanged safely, and that only verified users gain access to protected resources. With OpenID Connect, your Go applications can offer enterprise-grade single sign on, enabling users to move effortlessly between multiple applications while maintaining strong security standards.
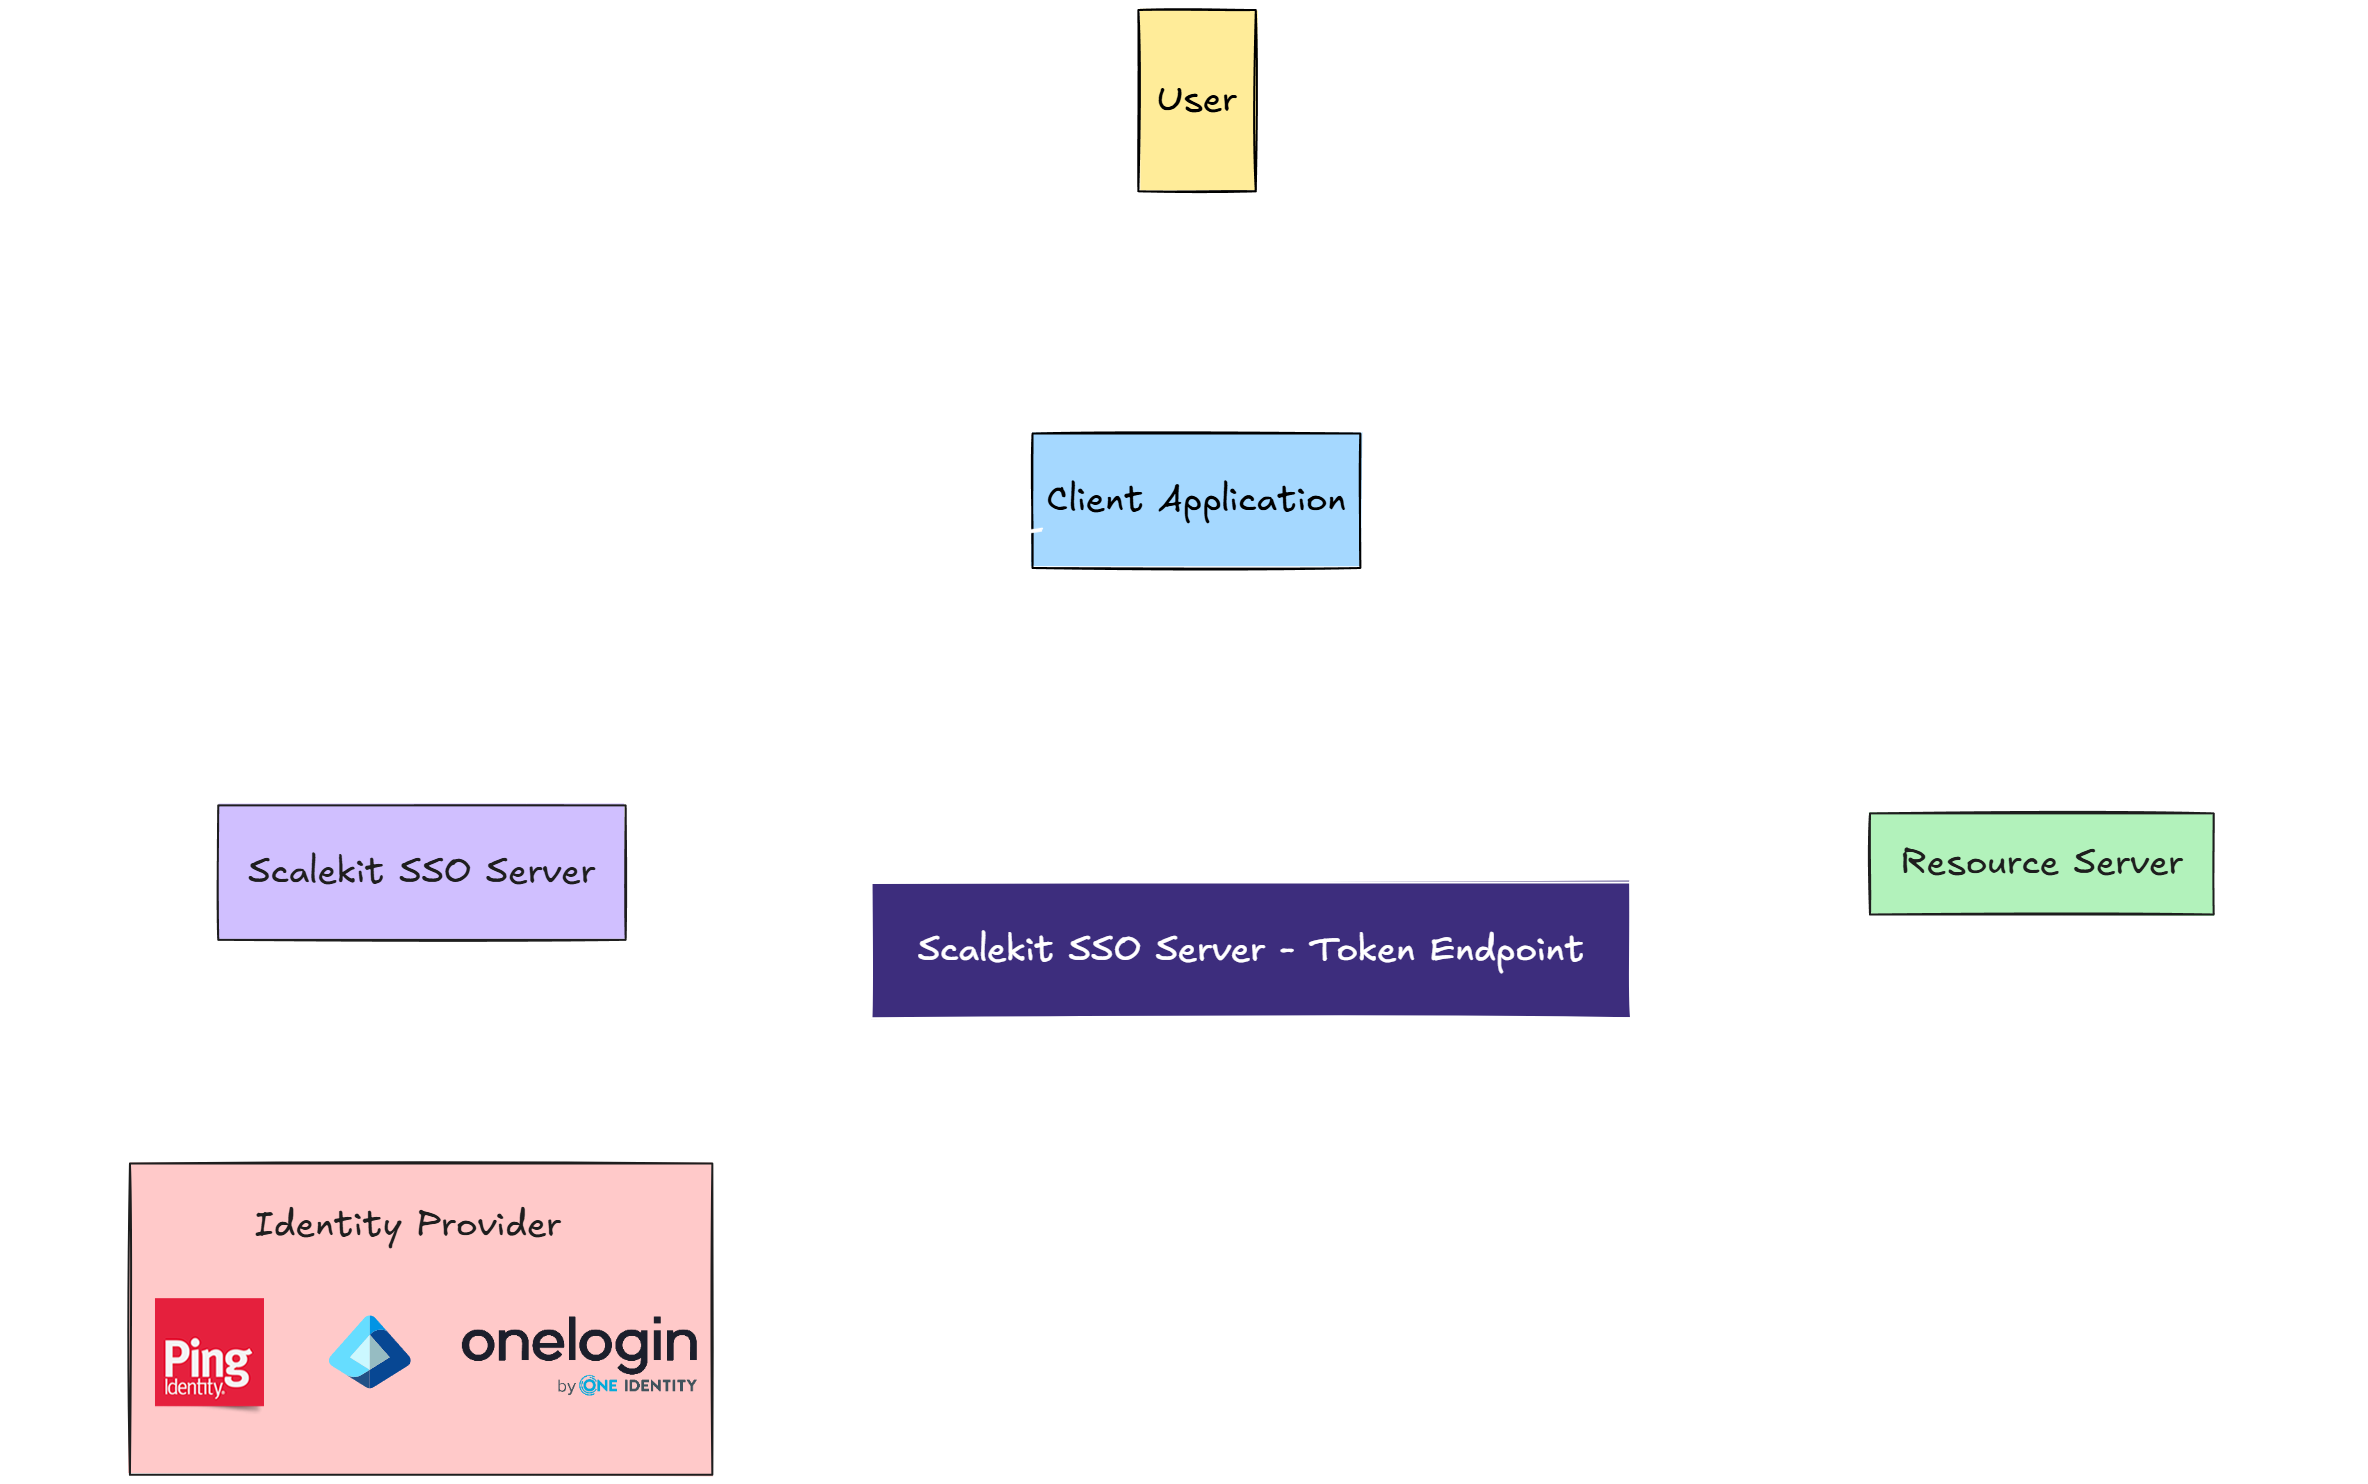
End-to-end flow
Here’s what the full SSO flow looks like using Scalekit in a Go application. Client applications interact with the SSO system to access protected resources.
- A user clicks “Login with SSO”
- Your app generates a redirect URL using Scalekit’s SDK
- Scalekit sends the user to their IdP (Okta, Entra ID, etc.)
- After login, the IdP redirects back to your app with an authorization code
- Your app exchanges the code for user identity details (e.g., email, roles) and at this point, a session or token is created.
- You establish a secure session and use the access token for authenticated API calls
Setting up SSO with Go
Start by creating a new project in your Go development environment to initialize your workspace and manage dependencies with a go.mod file.
Let’s dive into the implementation. Follow along with the source code while ensuring your Scalekit dashboard is properly set up with test credentials and a redirect URI for authentication.
Before you start
Before implementing SSO in your Go app, make sure to:
- Sign up on Scalekit and access the Dashboard
- Register your app’s redirect URI under API Config
- Copy your Environment URL, Client ID, and Client Secret
- Create the necessary configuration files or handlers for authentication
You’ll use these values when initializing the SDK.
1. Install the Go SDK
First, install the Scalekit SDK for Go by running:
This package simplifies handling SAML and OIDC authentication flows without manually dealing with tokens, assertions, or protocol intricacies.
2. Set environment variables
Configure your application with the necessary credentials:
These values are obtained from your Scalekit dashboard and are crucial for securely connecting to the authentication service.
3. Initialize the Scalekit client
Set up the Scalekit client in your Go application. This client interacts with the authentication service.
This code sets up a global Scalekit client. It reads authentication credentials from environment variables.
4. Generate the authorization URL
When a user clicks "Login with SSO," your app uses a method in the SDK to generates an authorization URL. This URL redirects the user to their IdP.
5. Redirect users to the IdP
Attach this route to your Go web server. When users visit /login, they are redirected to their IdP.
When a user accesses /login, the app redirects them to Okta, OneLogin, Entra, or another configured IdP.
6. Process the callback request
After authentication, the IdP redirects the user back to your app. The app receives an authorization code. It exchanges this code, which is processed in a callback handler function. For example:
The app exchanges the authorization code for user profile details. The received token is typically a jwt token, which is a JSON-based, digitally signed token used for secure authentication. Always validate the JWT token to ensure its integrity and authenticity.
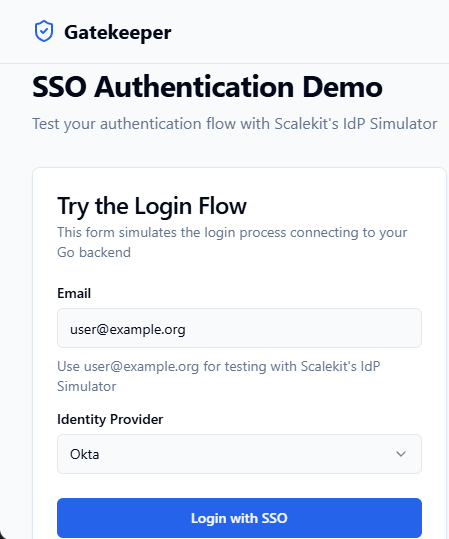
7. Test without a real IdP
Scalekit provides an IdP Simulator for testing. Instead of configuring a real Identity Provider, use a test email like: user@example.org. This allows you to simulate authentication flows during development. You can test the authentication flow by making an HTTP request to the login or callback endpoint, which helps validate your integration without a real IdP.
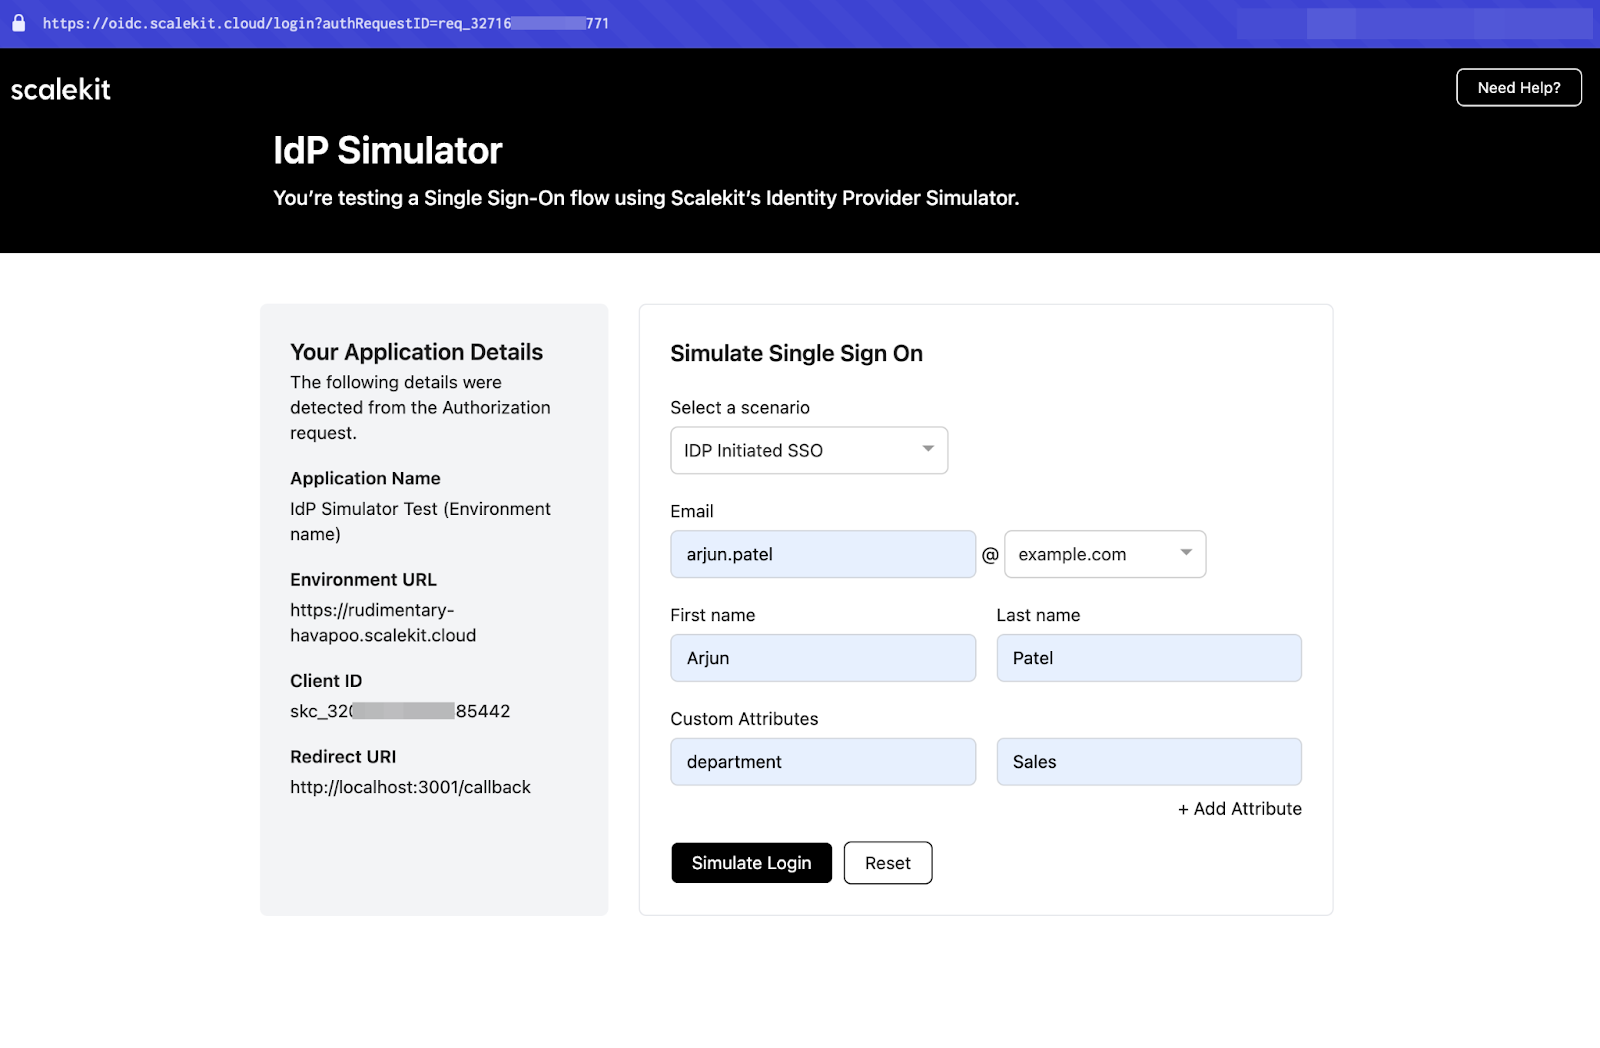
This allows you to simulate authentication flows during development.
Managing sessions in Go
Once authentication succeeds, and a user is logged in, their session must be managed securely. Never store tokens in local storage, as it exposes them to cross-site scripting (XSS) attacks.
1. Store idToken securely
Use an encrypted cookie for authentication tokens. Set HttpOnly and Secure flags to prevent JavaScript access. Proper client side implementation is crucial to ensure tokens are not exposed to security risks.
Example: Storing idToken in a secure cookie
2. Use accessToken for Future API Calls
After login, use the accessToken when making authenticated API requests. Before using the accessToken for API calls, always perform verification to ensure its integrity and authenticity. Never store it on the frontend. Always pass it securely in the Authorization header.
Example: Making an authenticated API call
Best practices for secure Go SSO
Security is crucial in SSO implementations. Follow these best practices to ensure a smooth implementation:
- Enforce HTTPS on login and callback routes to prevent MITM (Man-in-the-middle) attacks
- Rotate client secrets periodically to mitigate credential leaks
- Enable MFA (Multi-Factor Authentication) at the IdP level to add an extra layer of security
- Validate redirect URIs and state parameters to prevent OAuth CSRF attacks
- Log login attempts and token exchanges to detect suspicious activity
- Enable social login to allow users to authenticate with their existing social media accounts for improved convenience and security
Wrapping up
Scalekit simplifies SSO authentication in Go by handling complex SAML/OIDC flows in just a few API calls. No more manual token parsing or XML configs. Works with any Go framework: net/http, Echo, Fiber. Test locally with @example.org, then go live with Okta, Google, Entra, or JumpCloud.
With these best practices and Scalekit’s SDK, you can ship enterprise-ready SSO authentication in minutes.
Frequently Asked Questions
Can I use Scalekit SSO with Gin or Echo in Go?
Yes, Scalekit’s Go SDK works with any Go framework including net/http, Gin, Echo, and Fiber. You just need to handle the auth endpoints and callback using your framework’s routing system.
How do I store sessions in a Go app after login?
Use the returned idToken to establish a session. Store it in an HttpOnly, Secure cookie, or in a session store like Redis. Avoid storing tokens in localStorage to reduce XSS risks.
What if I have multiple customers using different IdPs?
Scalekit supports multiple Identity Providers. You can pass a connectionId, organizationId, or loginHint (like an email) to route each login to the correct IdP.
Can I enable Social Login in my Go app with Scalekit?
Yes. Alongside enterprise SSO, Scalekit supports Social Login (Google, Microsoft, GitHub, etc.). Use the provider field when generating the authorization URL.
Want to add enterprise-grade SSO to your Go apps in minutes, not months? Sign up for a Free Forever account with Scalekit and let our SDK handle the protocol plumbing. Questions about Go integration or customizing flows? Book time with our auth experts.


