
Frictionless logins, email-first flow, no passwords
Scalekit now supports passwordless authentication, allowing your users to sign in using just their email — either by clicking a secure magic link or by entering a one-time passcode (OTP) sent to their inbox. No passwords to create, reset, or store.
Whether you're building a custom UI or want a fast drop-in redirect experience, Scalekit gives you production-grade passwordless auth in minutes.
Why go Passwordless?
- No passwords to store or reset
- Works out of the box with modern browsers and clients
- Secure against phishing and reuse
- Works with hosted login or your custom UI
- Full branding control via email templates and domain setup
Here are two ways you can implement passwordless auth:
- OIDC Flow (Redirect-based)
Let Scalekit handle the UI and auth state. Ideal for apps using hosted login or needing quick setup with token-based sessions. - Headless API Flow
Use direct API calls to send OTPs or magic links and verify them manually. Fully customizable UX with complete control over the frontend.
This guide covers the Headless API flow.
How it works
What You’ll Need
Before getting started, make sure you have:
- Access to your Scalekit account and API credentials
- The Scalekit SDK installed in your project
- A terminal or dev environment ready to send API requests
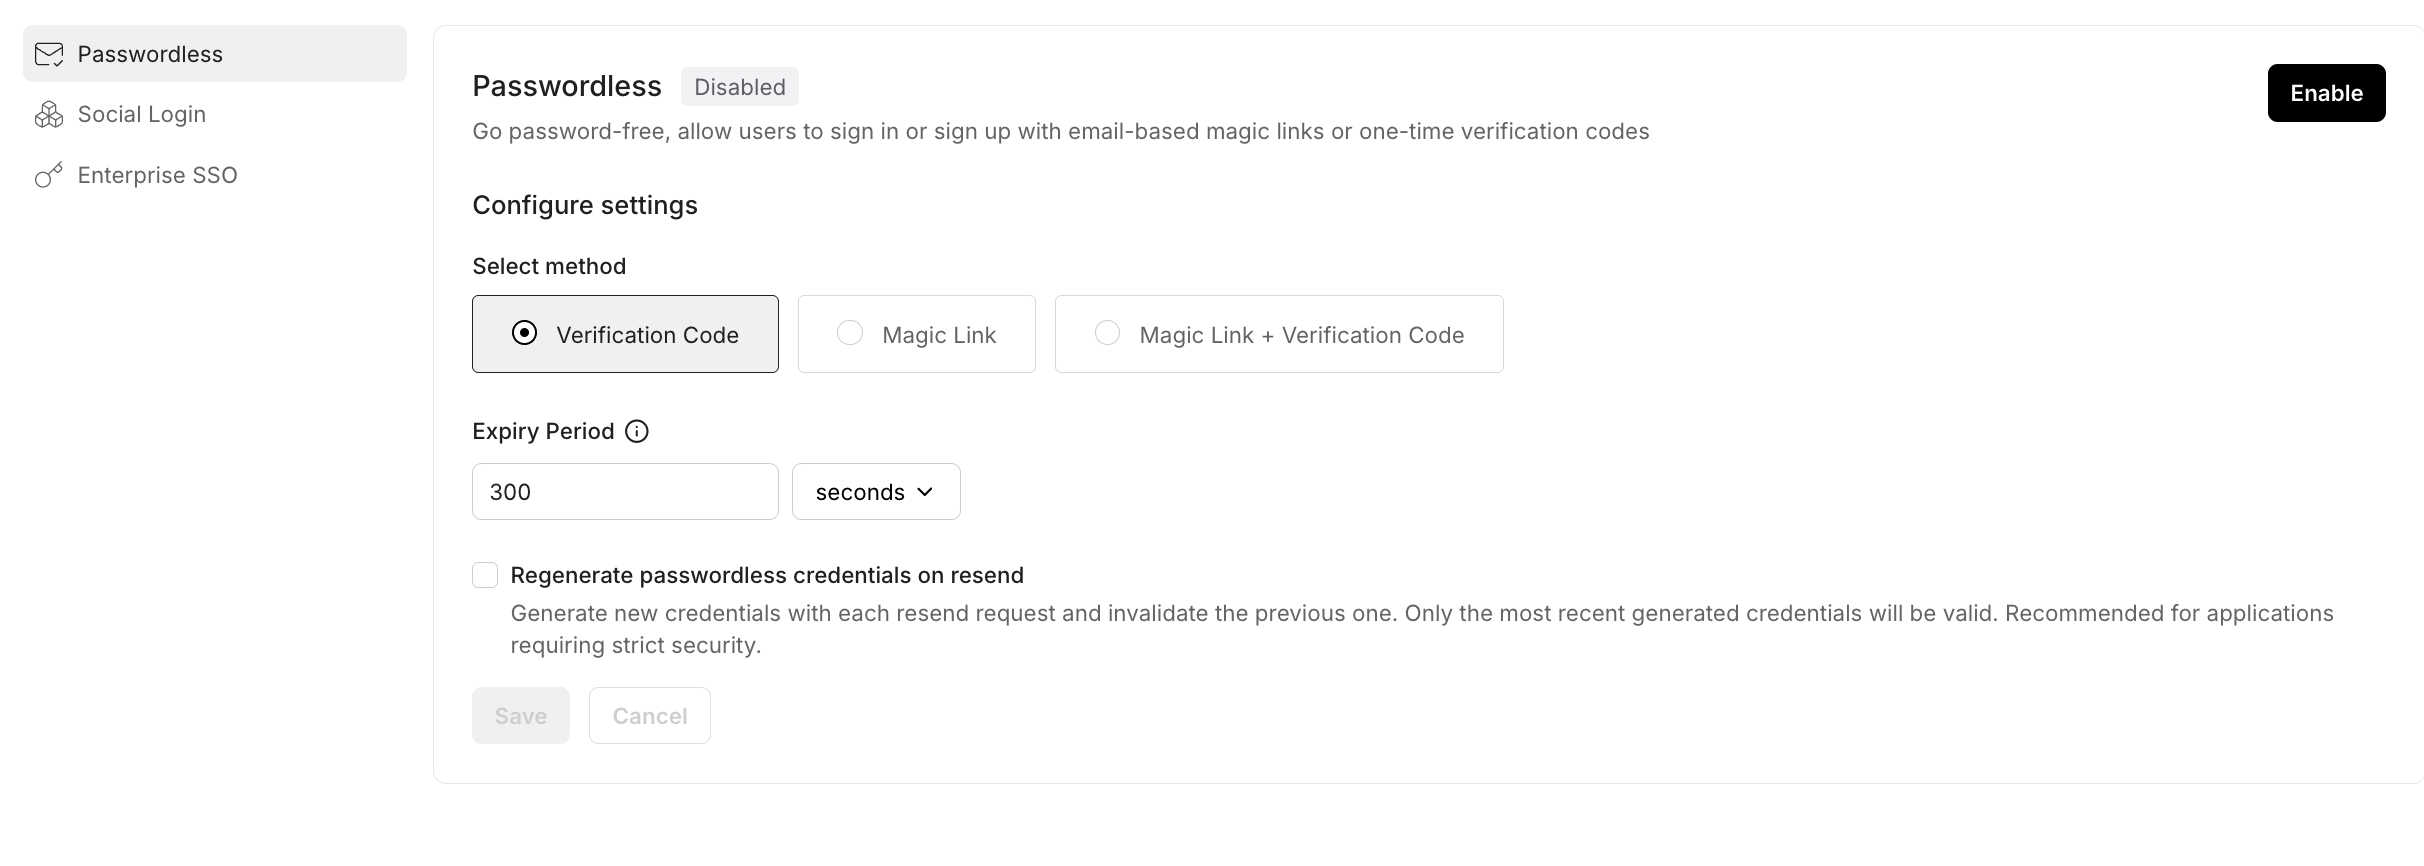
Step 1: Configure Passwordless Auth in the Dashboard
In your Scalekit Dashboard:
- Go to Authentication → Auth Methods
- Under Passwordless, choose your preferred method: code, link, or both
- Save your changes to activate the flow
Step 2: Trigger the Verification Email
Once a user submits their email:
- Send a request to Scalekit to deliver a verification email
- You can customize the expiry time, email template, and redirect URI
- The API returns an
auth_request_id,which is used in the next step
Depending on your setup, users will receive either:
- A one-time code to enter in your app
- A magic link that verifies them when clicked
- Or both, giving them a choice
If users request another email:
- Send a resend request using the same auth_request_id
- You can optionally enable the dashboard setting to generate new credentials on resend
Scalekit allows up to 2 emails per minute per email address
Step 3: Verify the User
Once the user receives the email:
- If you’re using a verification code, prompt them to enter it and verify using the API.
- If you’re using a magic link,
extract the link_tokenfrom the URL when they click it and verify.
For added security, if you’ve enabled “Enforce same browser origin”, you’ll also pass the auth_request_id when verifying a magic link.
Scalekit allows up to 5 verification attempts per user within a 10-minute window.
Passwordless Auth is included in every Scalekit plan. Start your trial now or refer to docs.

